Click a cell to copy it into ThinkWave. Description copies the assignment HTML.
Name
Assigned
Due
Points
Description
Intro Survey
4 Sep 2024
4 Sep 2024
2
click to copy
Fill out the intro survey to let me know a little bit about you and your experience with computer science.
ThinkWave Check-in
4 Sep 2024
11 Sep 2024
1
click to copy
Step One: Log in to ThinkWave
You should be able to login to ThinkWave and see your class list.
Step Two: Take a Screenshot
To make sure everything in ThinkWave is hooked up, please save a screenshot of your class list or dashboard.
Knowing how to take a screenshot will be important if there ever comes a time that you need help with an assignment.
Step Three: Send Me an Email
Turn in your assignment by sending me an email at [email protected]. Make sure to attach your screenshot to the message! Email is the primary way you can communicate with me throughout the semester.
Please send the message from your student email. This email will be used for additional platforms required for this class (Google Form submissions, JDoodle, etc.).
Hello, World!
12 Sep 2024
18 Sep 2024
3
click to copy
A classic first program to test that your toolchain (runtime environment, compiler, IDE, etc.) is set up properly is the “Hello, World!” program.
…the tradition of using the phrase “Hello, World!” as a test message was influenced by an example program in the 1978 book The C Programming Language…
An integrated development environment (IDE) is a program that provides text editing, syntax highlighting, file explorer, debugging tools, and other things that are useful for coding. For this class, we will use JDoodle as our IDE which runs in a web browser and allows you to access your work across multiple computers.
Visit www.jdoodle.com and set up an account. I recommend using your student Gmail account so you don’t have to remember another password.
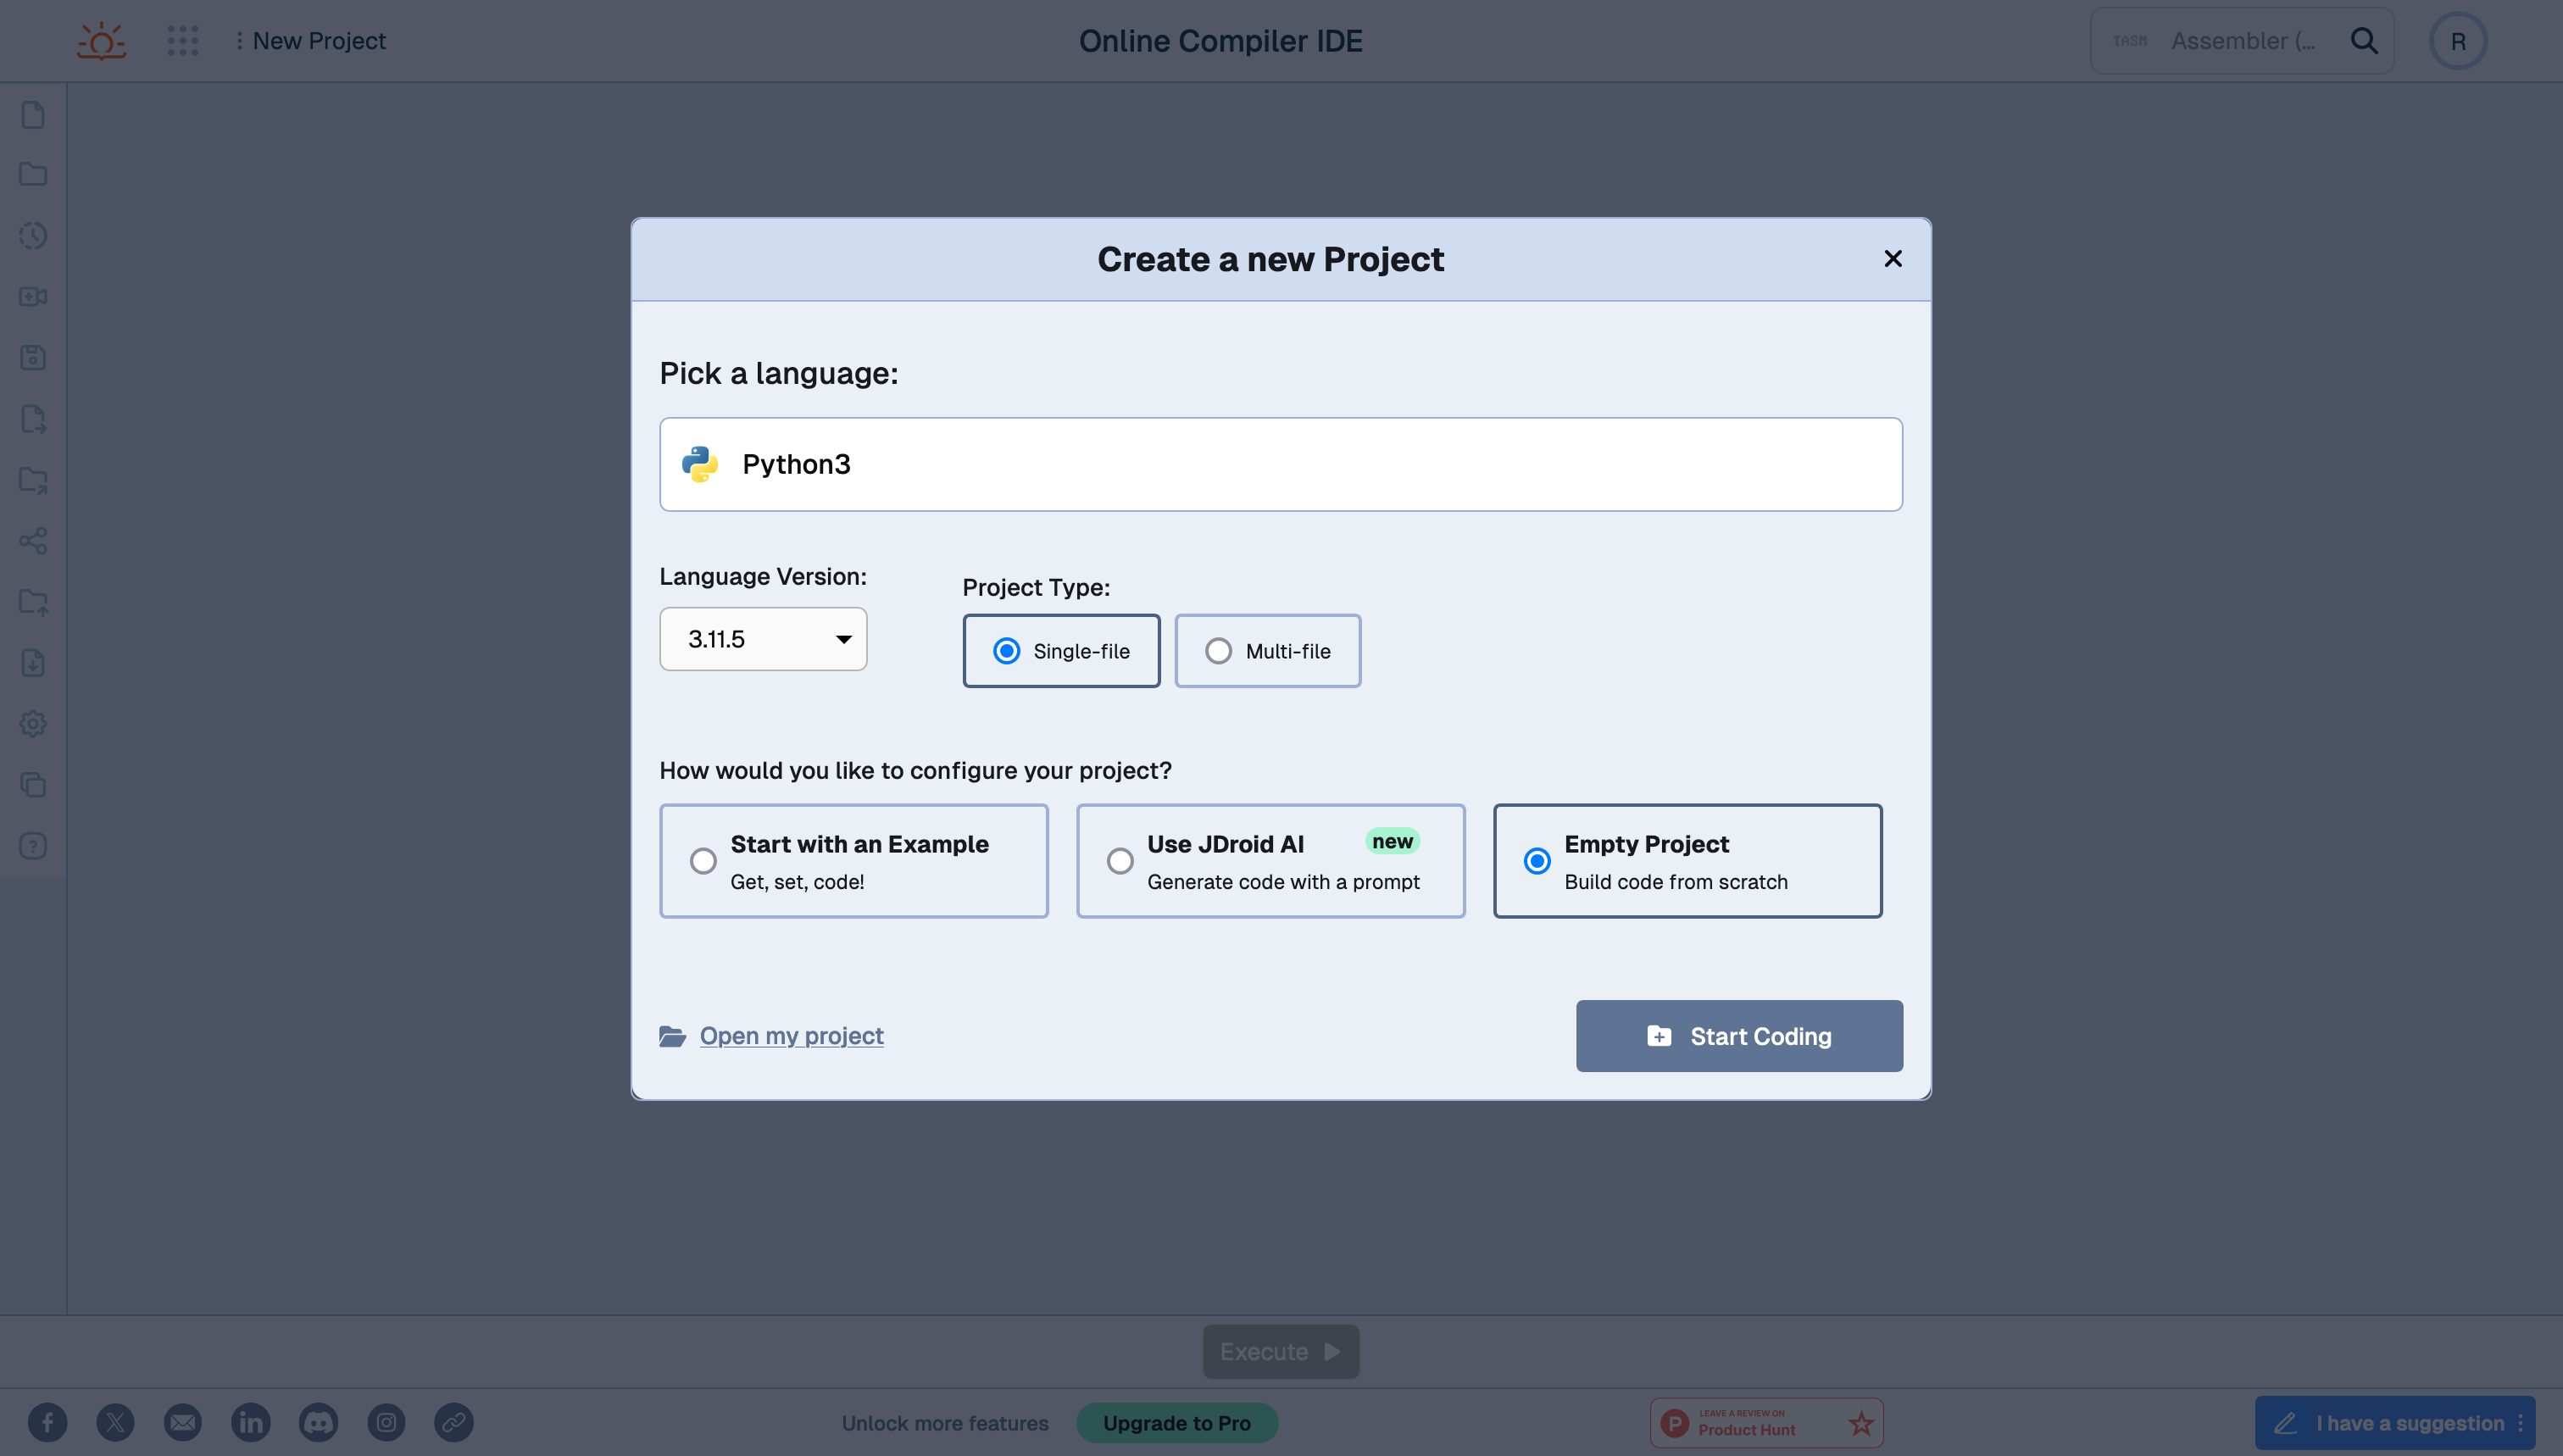
2. Create a New Python Project
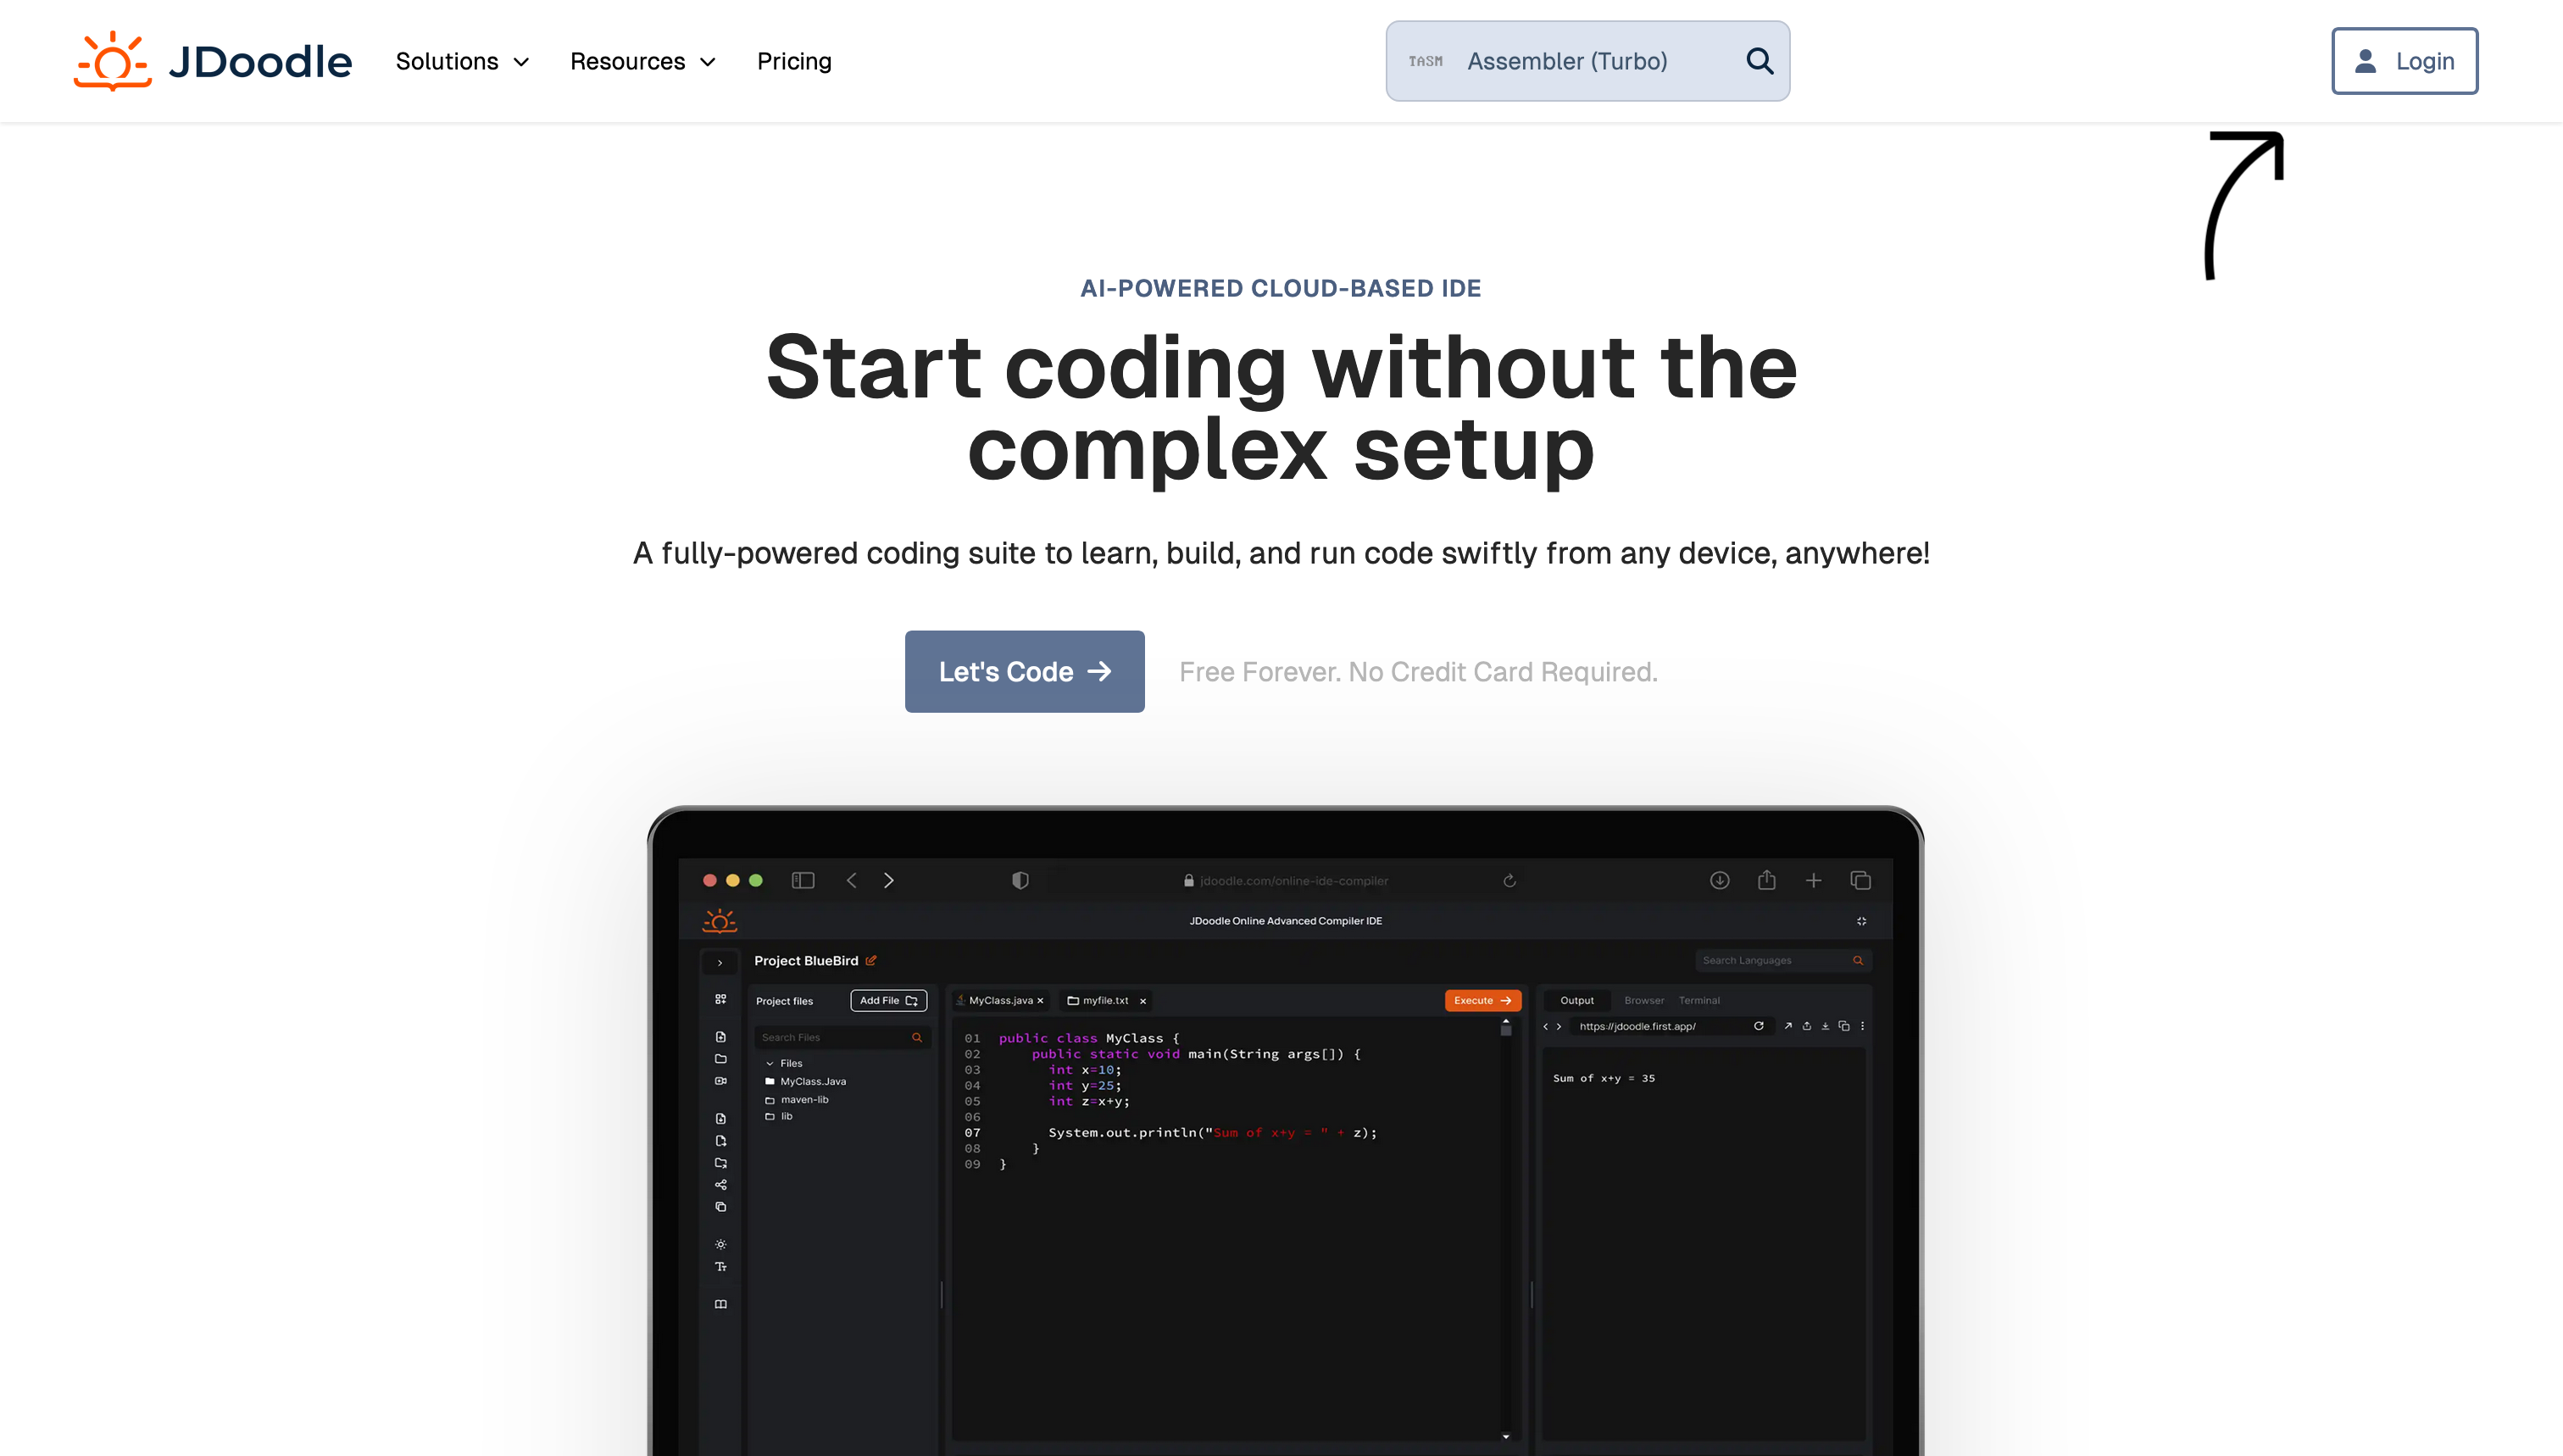
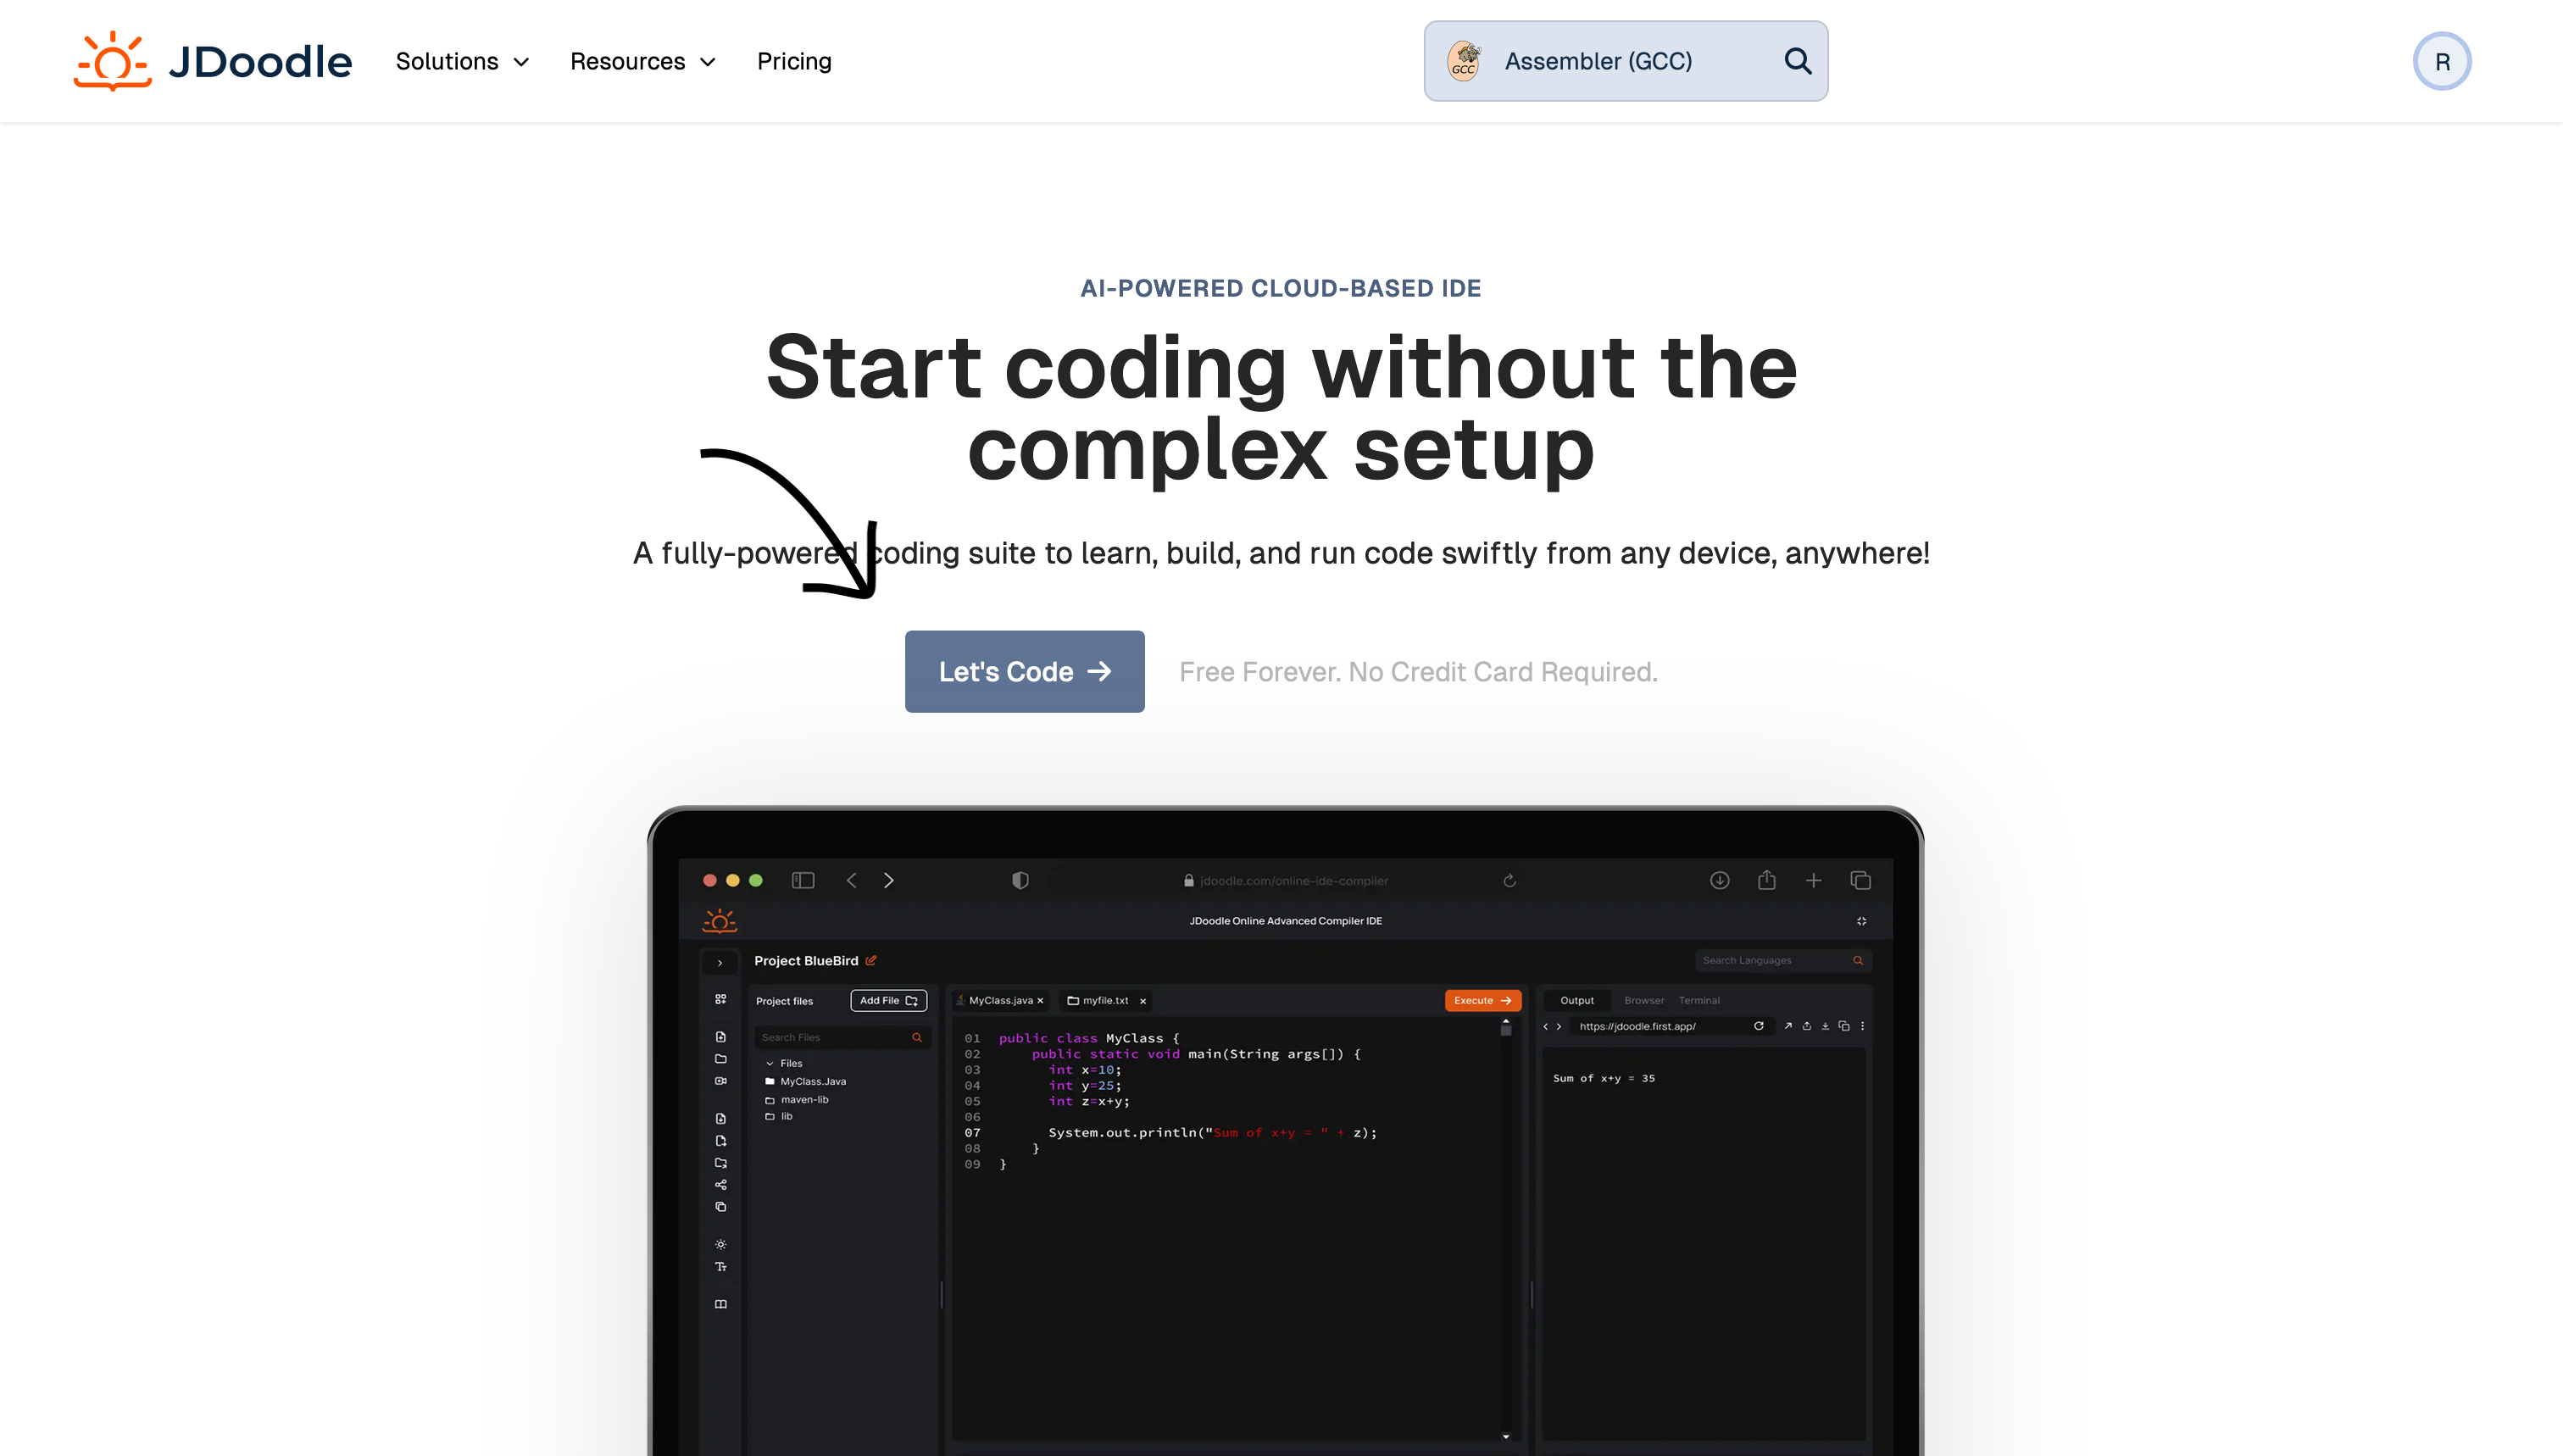
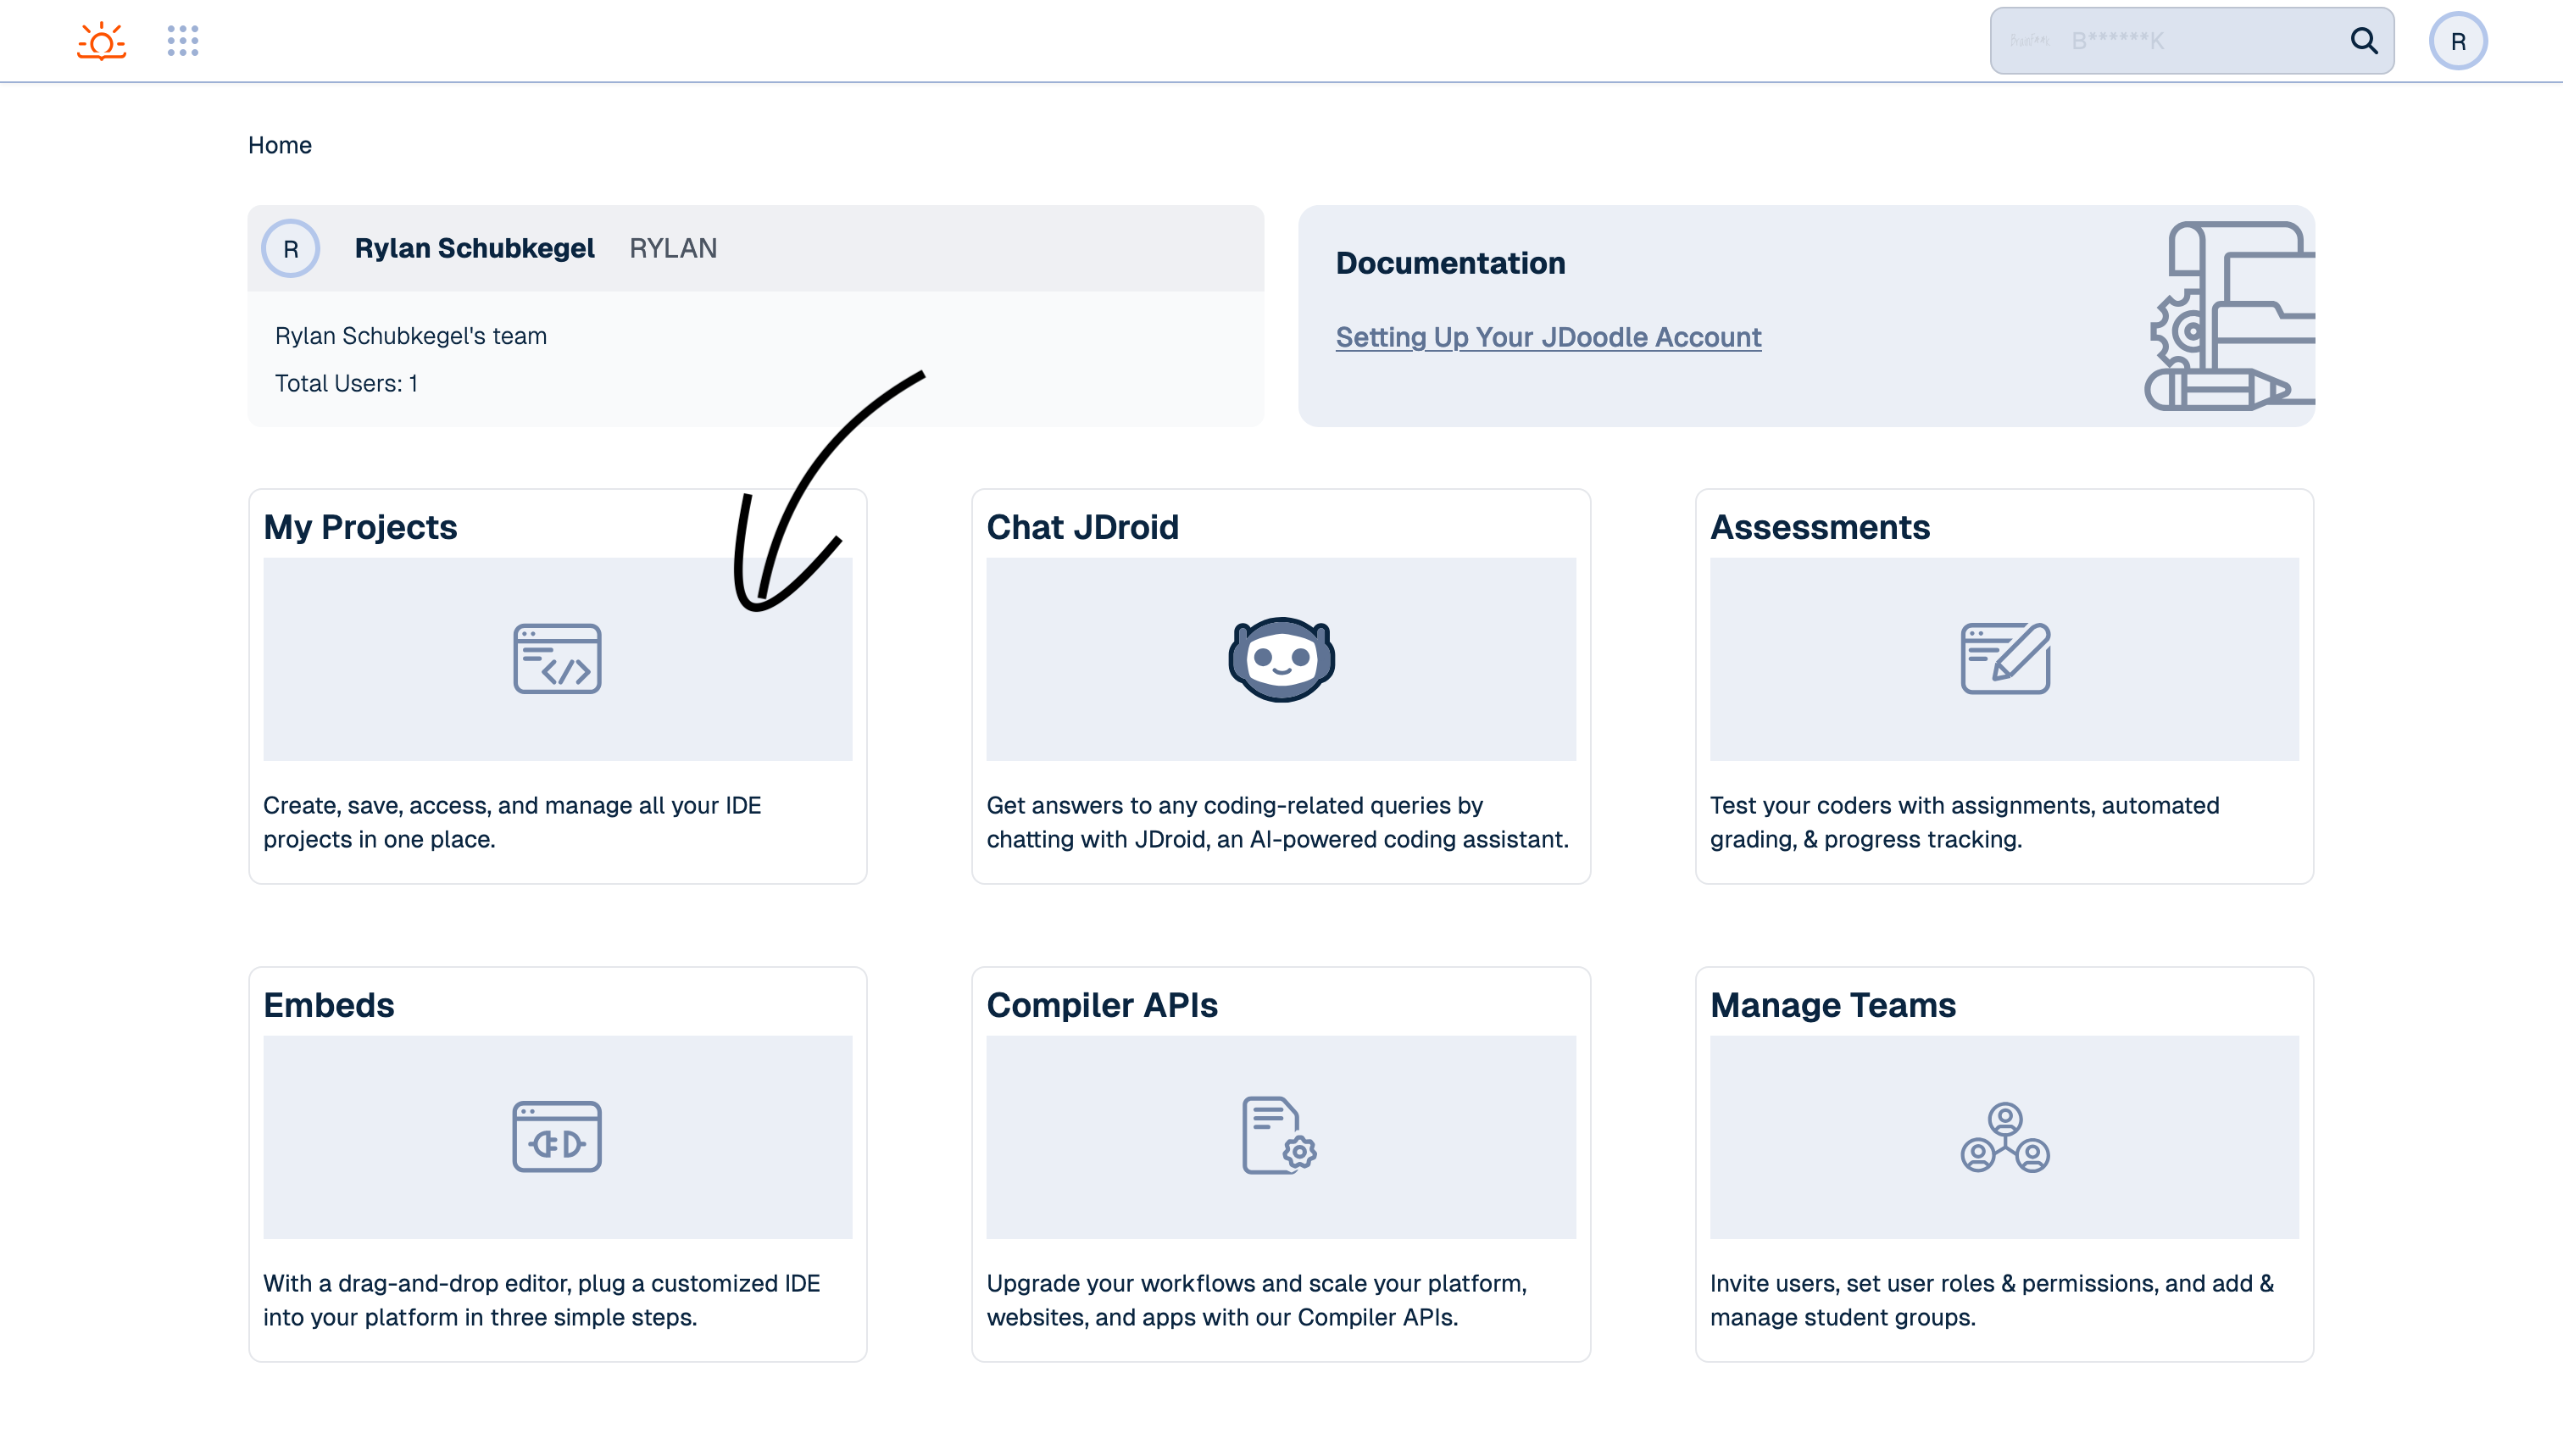
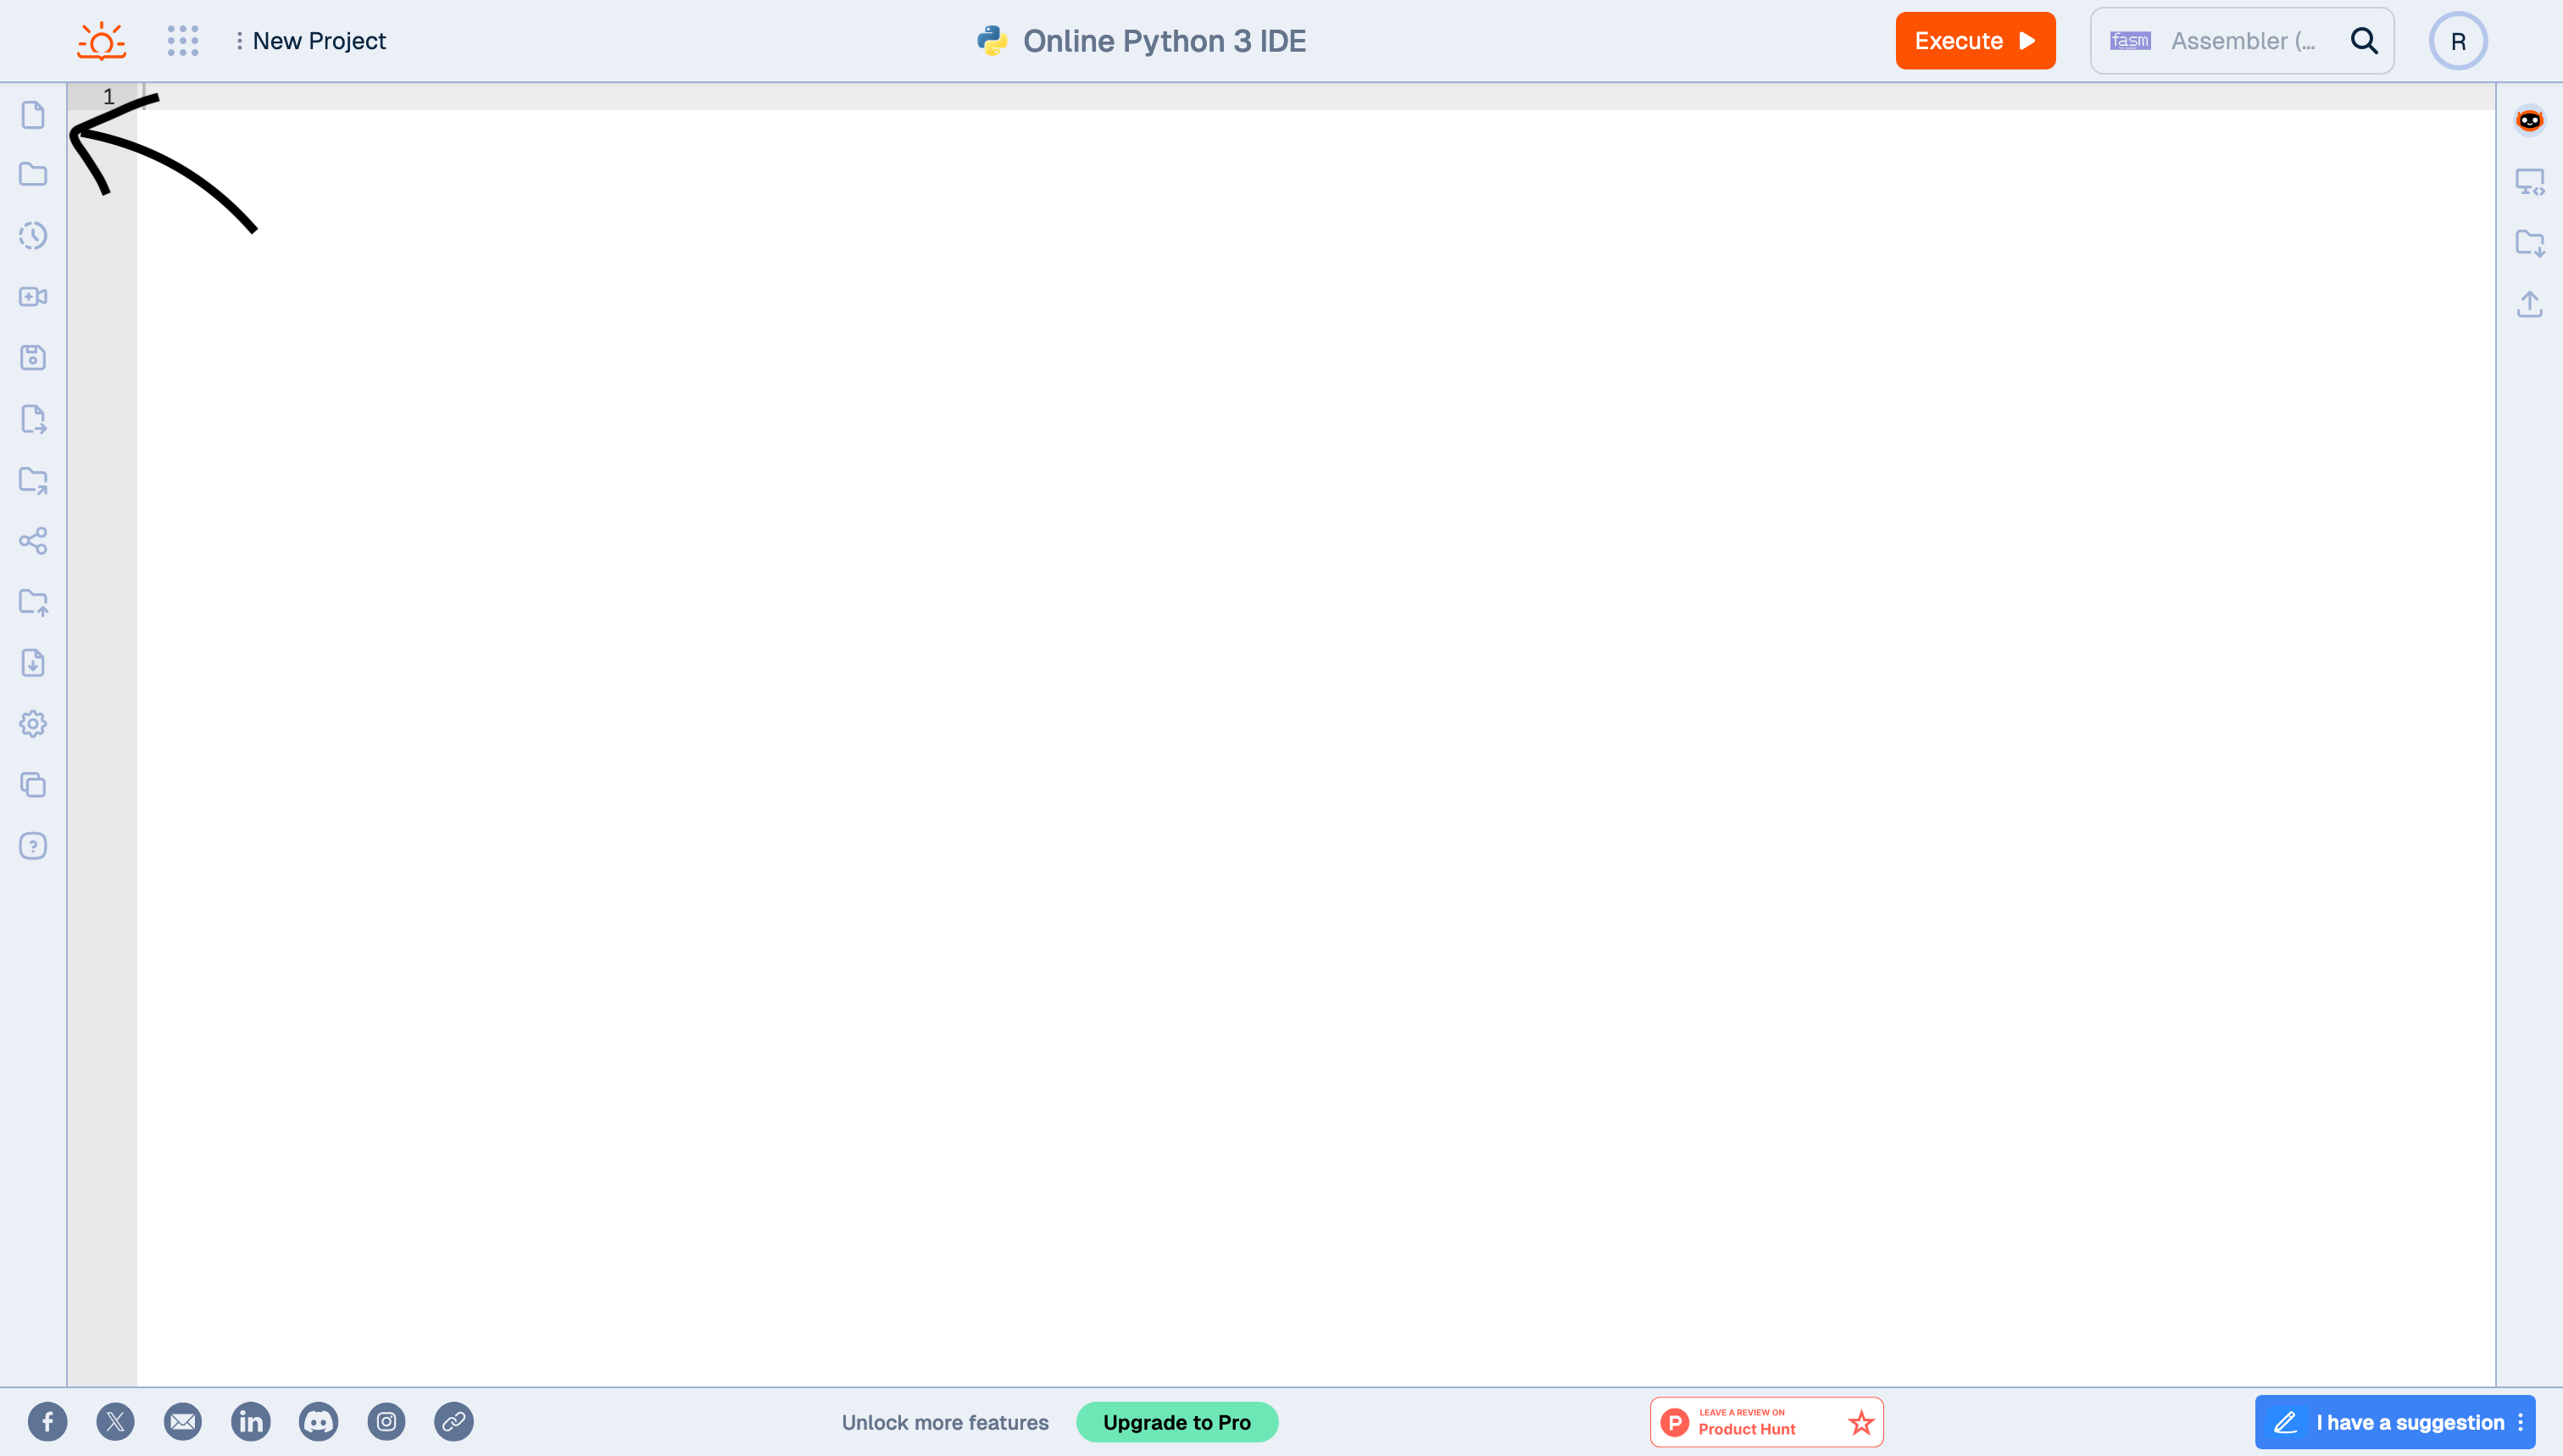
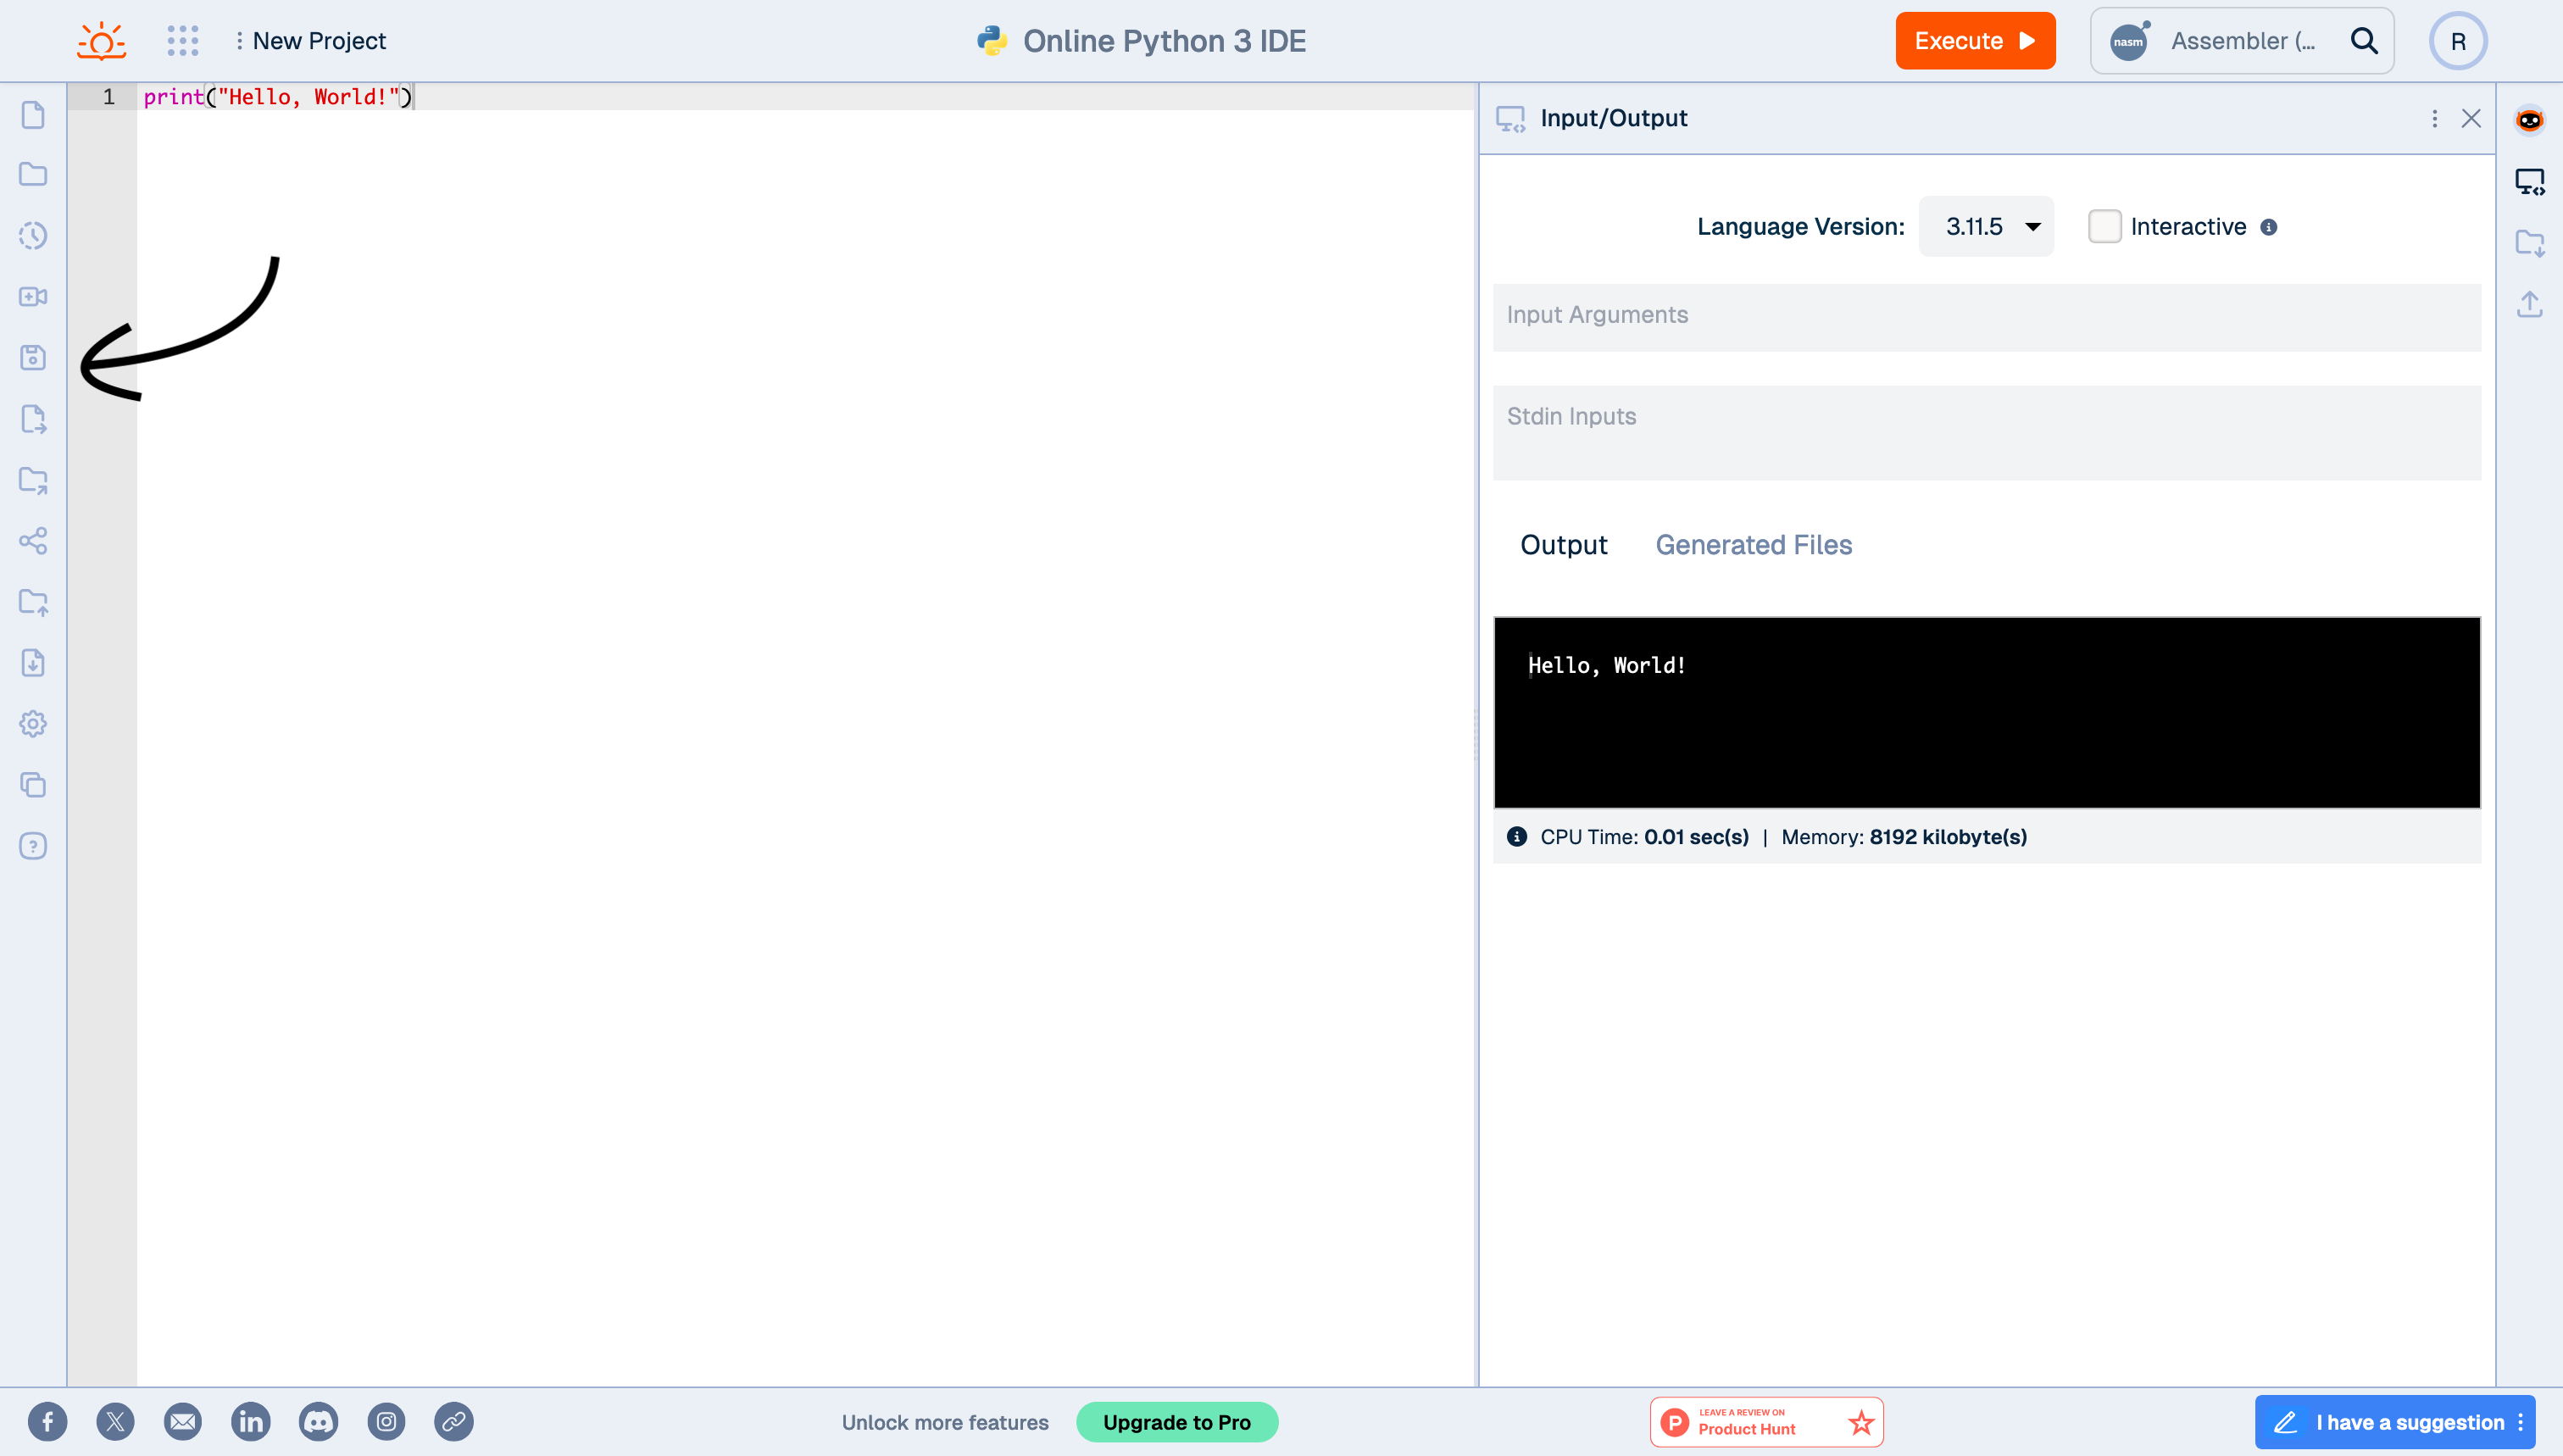
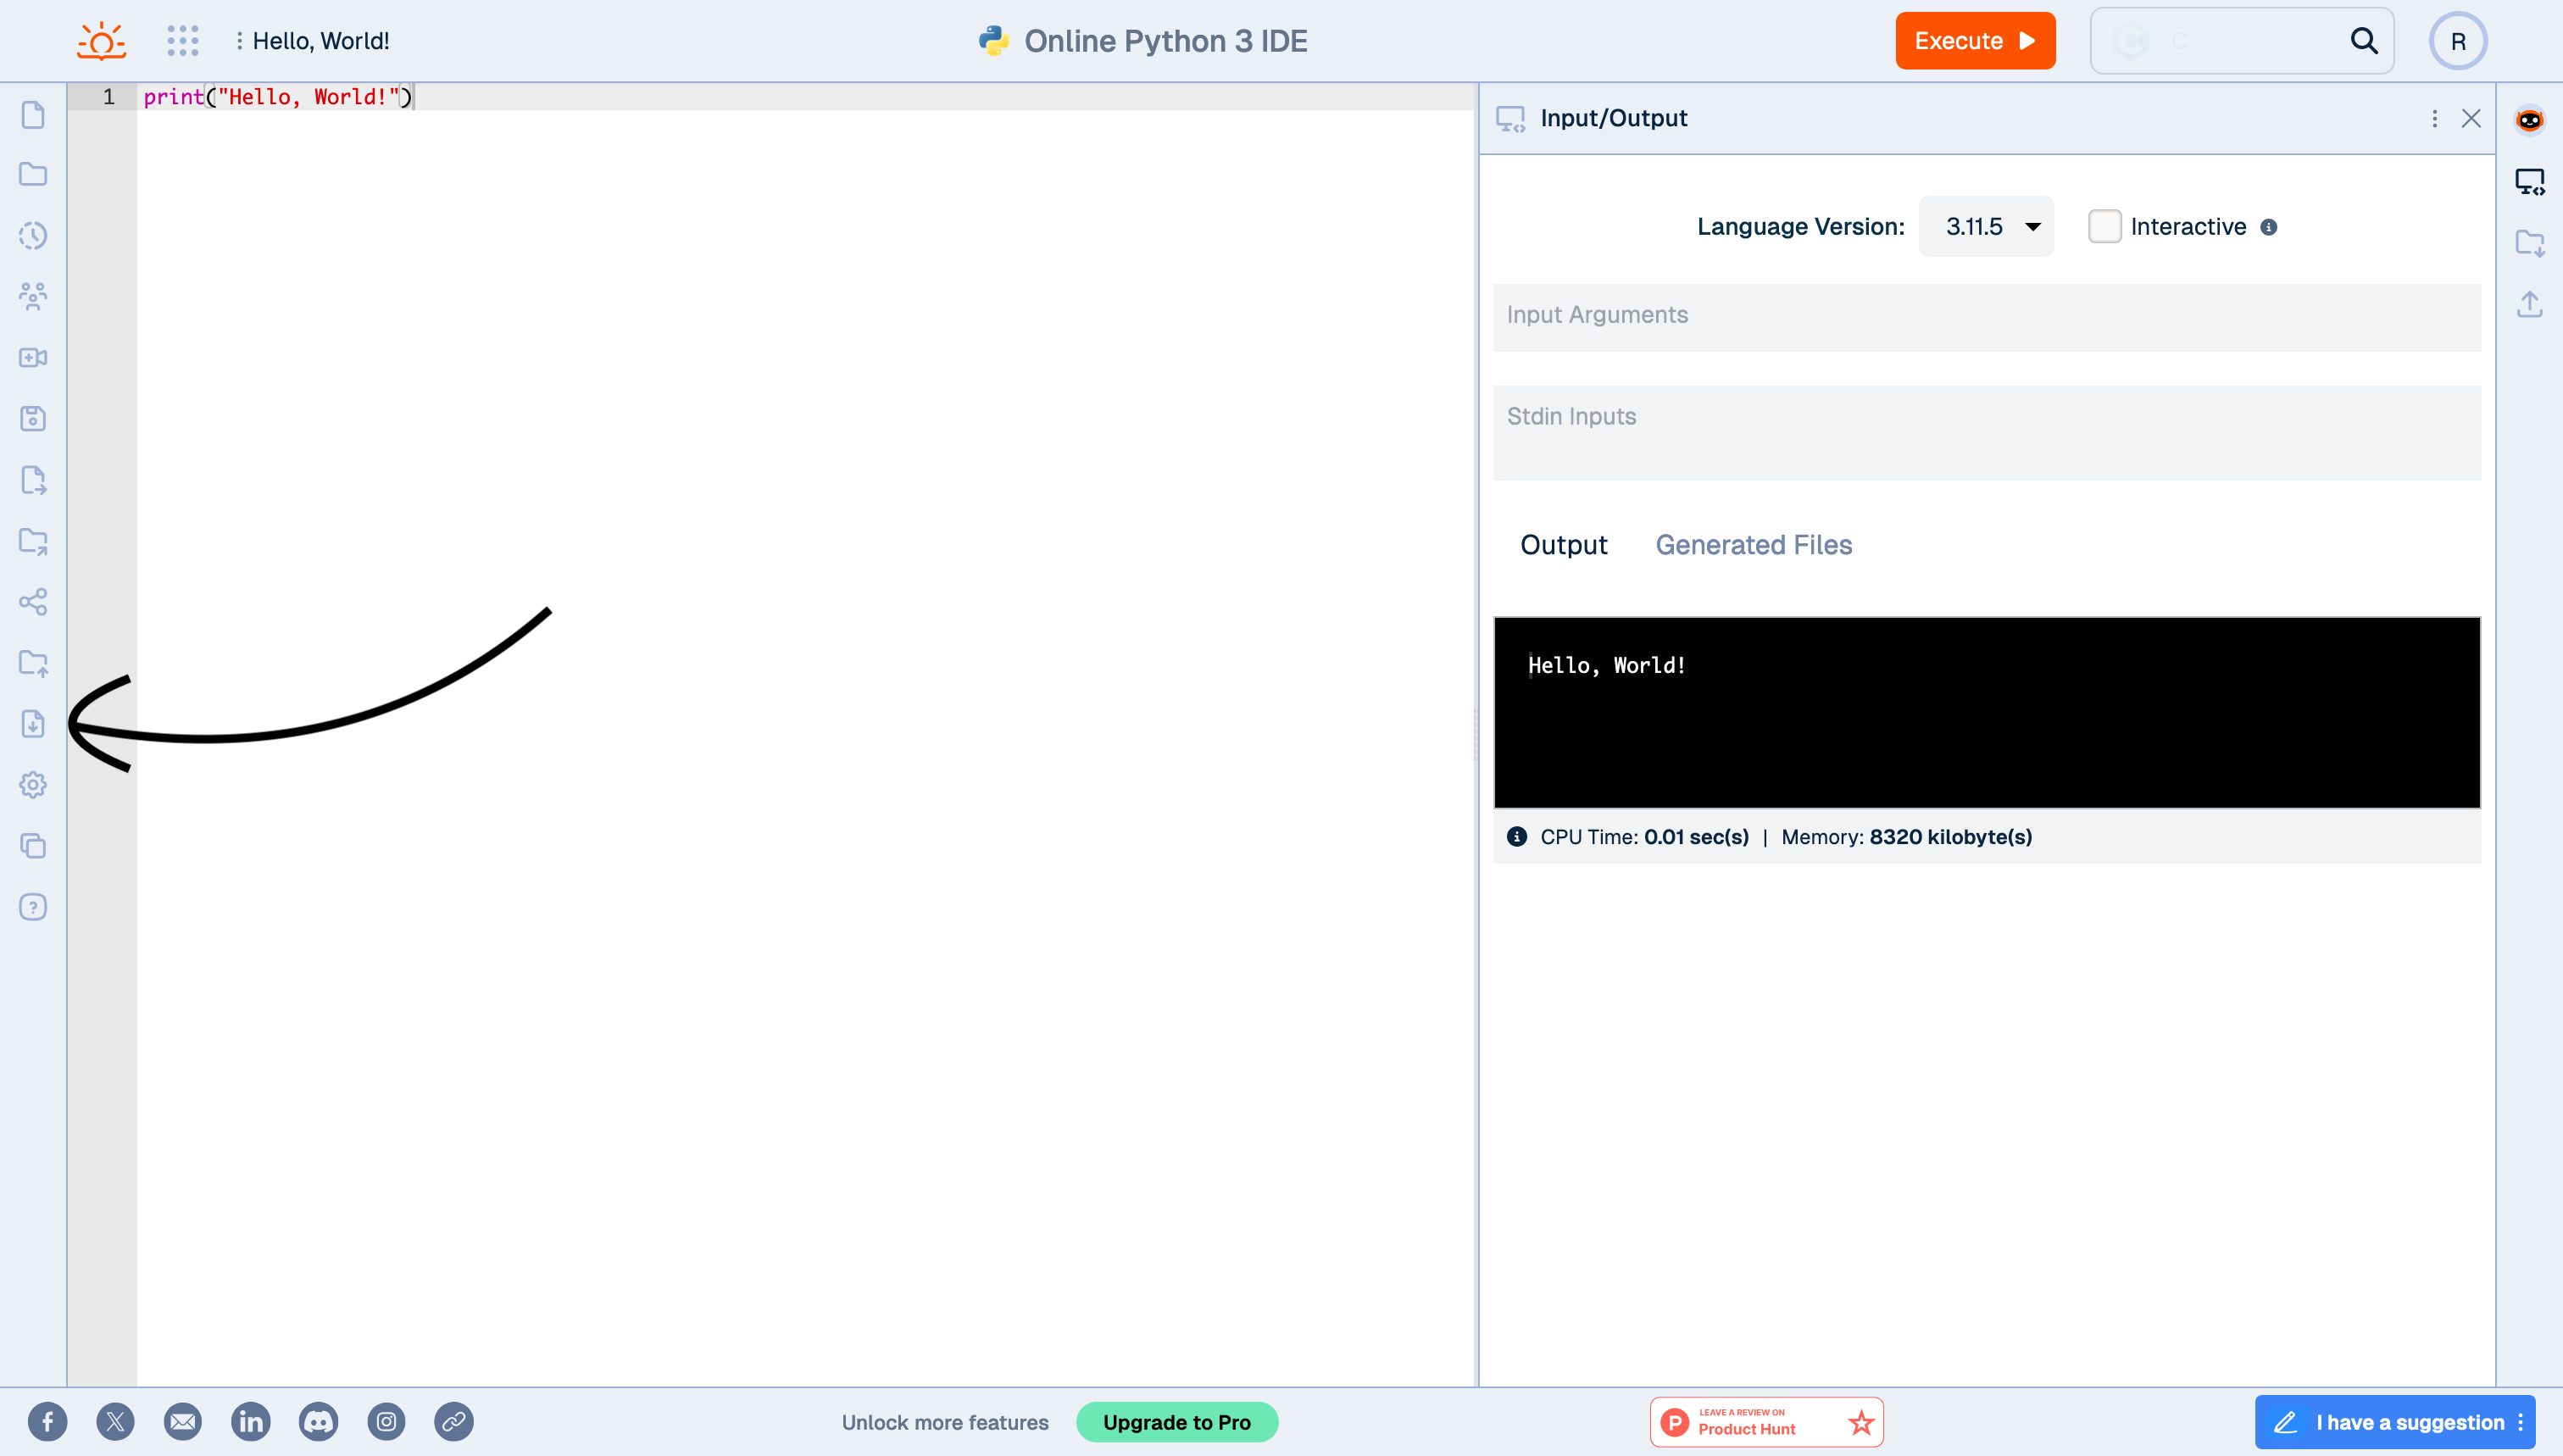
There are several ways to create a new project, a few examples are shown below.
From the landing page
From dashboard
From editor
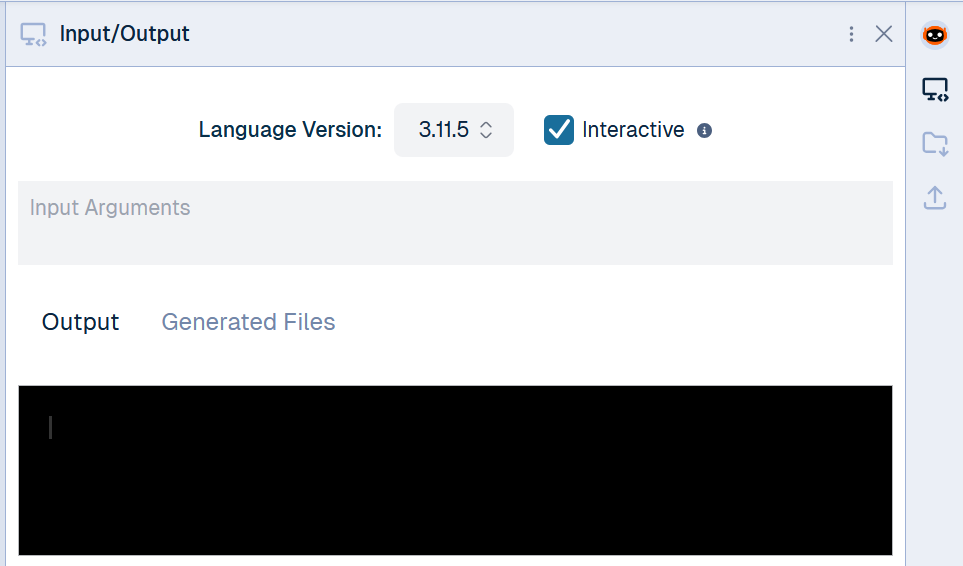
When you find a button that allows you to create a new project, make sure the project settings match what is listed below.
3. Print “Hello, World!”
Type the following code in your editor and press the “Execute” button at the top right of the screen. You should see an “Input/Output” window appear with the text “Hello, World!” in the terminal.
print("Hello, World!")
The term “printing” in computer programming originates from the early days of computing, when output was often produced on physical printers. In the 1950s and 1960s, computers used line printers, which printed output on paper, line by line. Programmers would write code to “print” output to the printer, which would then produce a physical printout of the results.
4. Save Your Project
Press the save icon, give your project a descriptive name, and press “Save.” Make sure to save often when you are working!
The save icon, often represented by a floppy disk, has its origins in the early days of personal computing. The floppy disk was a common storage device used to save and transfer files in the 1970s and 1980s.
The save icon exemplifies a type of design known as “skeuomorphism” where an image represents and older, typically physical, version of the thing it represents. You can see this in other other common icons such as a trash bin representing a “delete” operation or a paper airplane representing the “send message” action. What other examples of skeumorphism can you think of?
5. Experiment
You can do a lot by just printing to the terminal! Here are some ideas to get started:
Use multiple print() statements
Try printing with the special characters \t and \n
Make a simple game to practice using loops! Your program must meet the following specifications:
Ask the user to pick from the following number ranges:
10
100
1000
Pick a random number within the specified range
Use a loop to repeatedly ask for guesses within the number range
If the user guessed correctly, exit the loop
If the user guessed incorrectly, tell them if their guess was too high or too low
Tell the user how many guesses they made
Additional Challenges (not required)
Give the user a different score based on how many guesses they made
Allow the user to quit at any time by pressing q
Allow the user to play multiple times in a row
Random Numbers
To generate a random number, you can use the built-in module random. We will learn about modules later, but for this project you may copy/paste the following code:
# Imports the randint function from the random modulefrom random import randint# Generates a number within the range 1 through 10randint(1, 10)
Computers can generate numbers that appear to be random, but they are not truly random. This is because computers are deterministic machines, meaning that their output is determined by their input and the algorithms used to process that input.
Example Code
Since I did not record the activity/project time during class, here is the code that we “pair programmed” to help you out. Make sure to fill out the TODO comments with your own code to meet the specifications listed above!
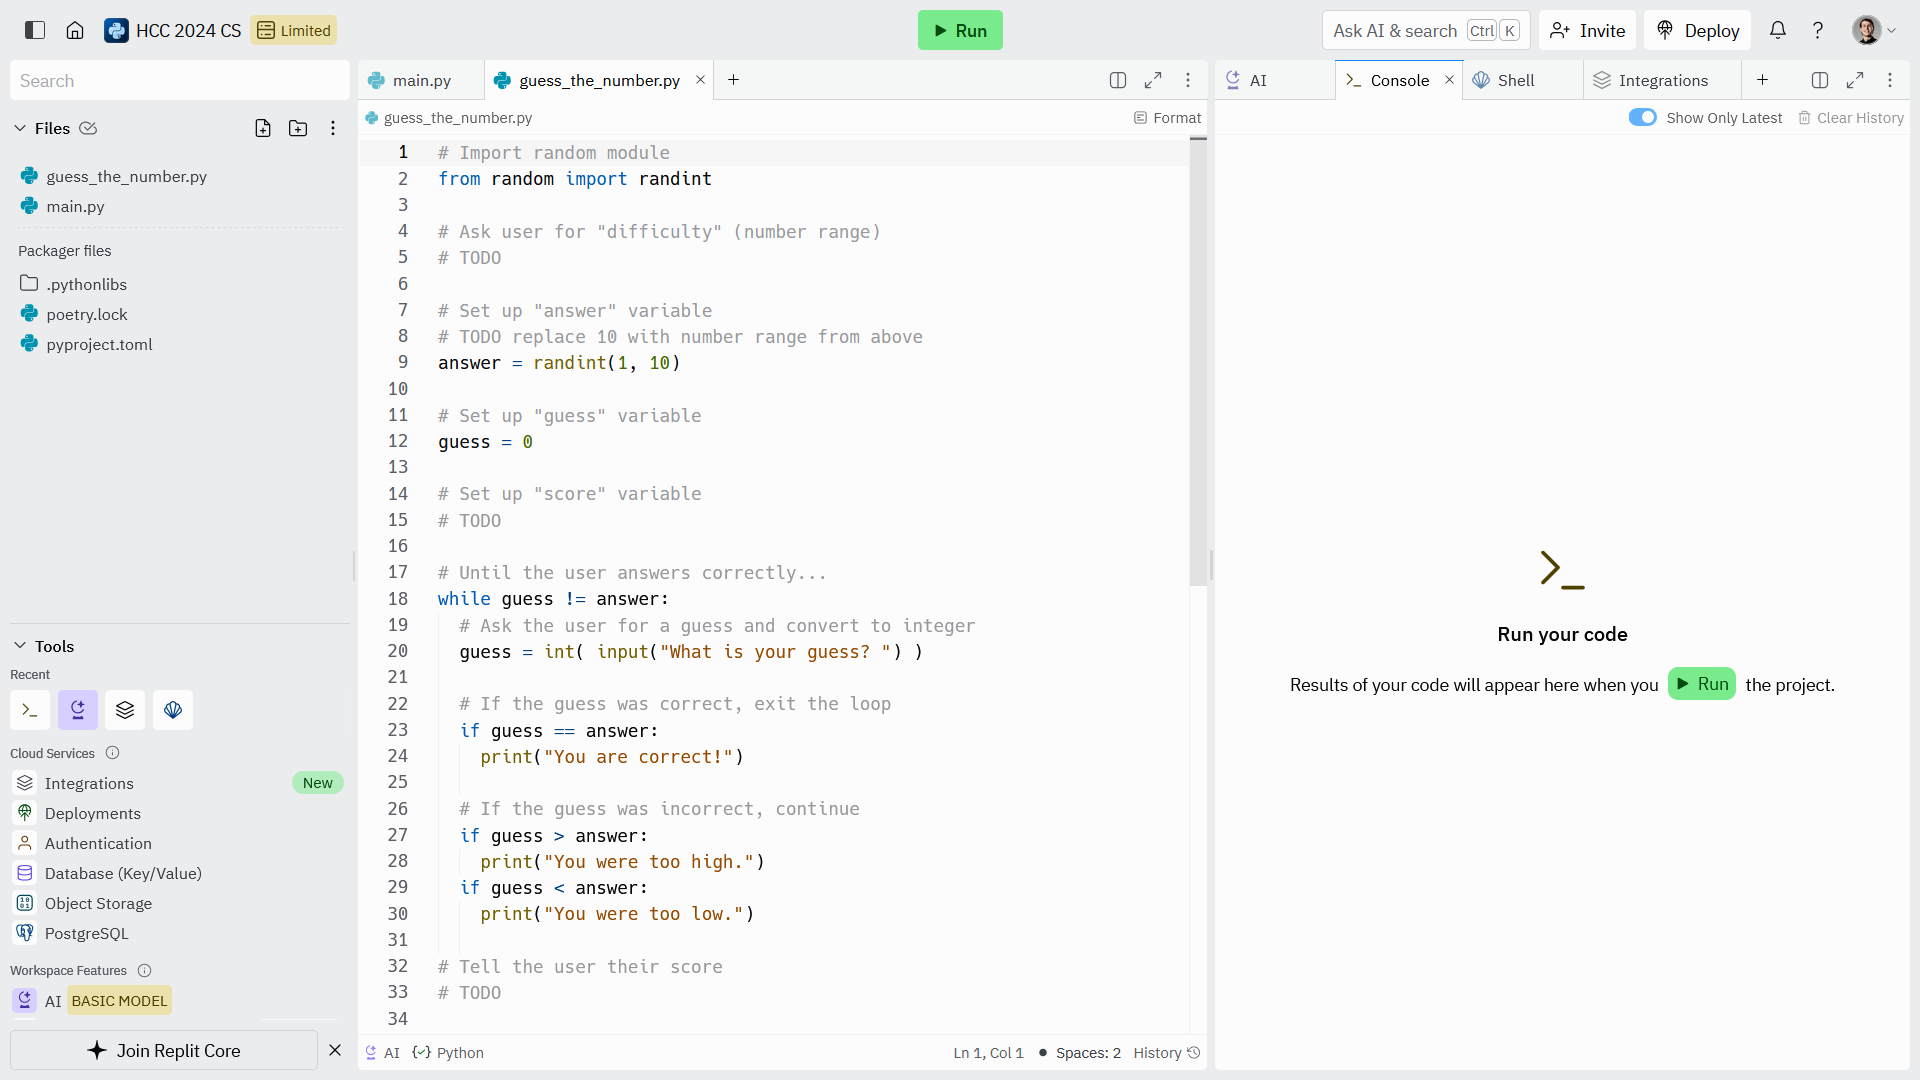
# Import random modulefrom random import randint# Ask user for "difficulty" (number range)# TODO# Set up "answer" variable# TODO replace 10 with number range from aboveanswer = randint(1, 10)# Set up "guess" variableguess = 0# Set up "score" variable# TODO# Until the user answers correctly...while guess != answer: # Ask the user for a guess and convert to integer guess = int( input("What is your guess? ") ) # If the guess was correct, exit the loop if guess == answer: print("You are correct!") # If the guess was incorrect, continue if guess > answer: print("You were too high.") if guess < answer: print("You were too low.")# Tell the user their score# TODO# Done 🎉
Submit
Make sure you test your program before submitting!
I apologize for changing our tooling so much, I am trying to find an IDE that is free, simple, and performant. Hopefully Replit will be the last one 🤞🏻
Replit is has a free tier that allows up to 3 projects. Since we will have more than 3 projects, each project will be a separate file in a single project. That means all the assignments for the semester will be in a single project.
REPL stands for Read-Eval-Print Loop. It is a computer environment where user inputs are read and evaluated, and then the results are returned to the user.
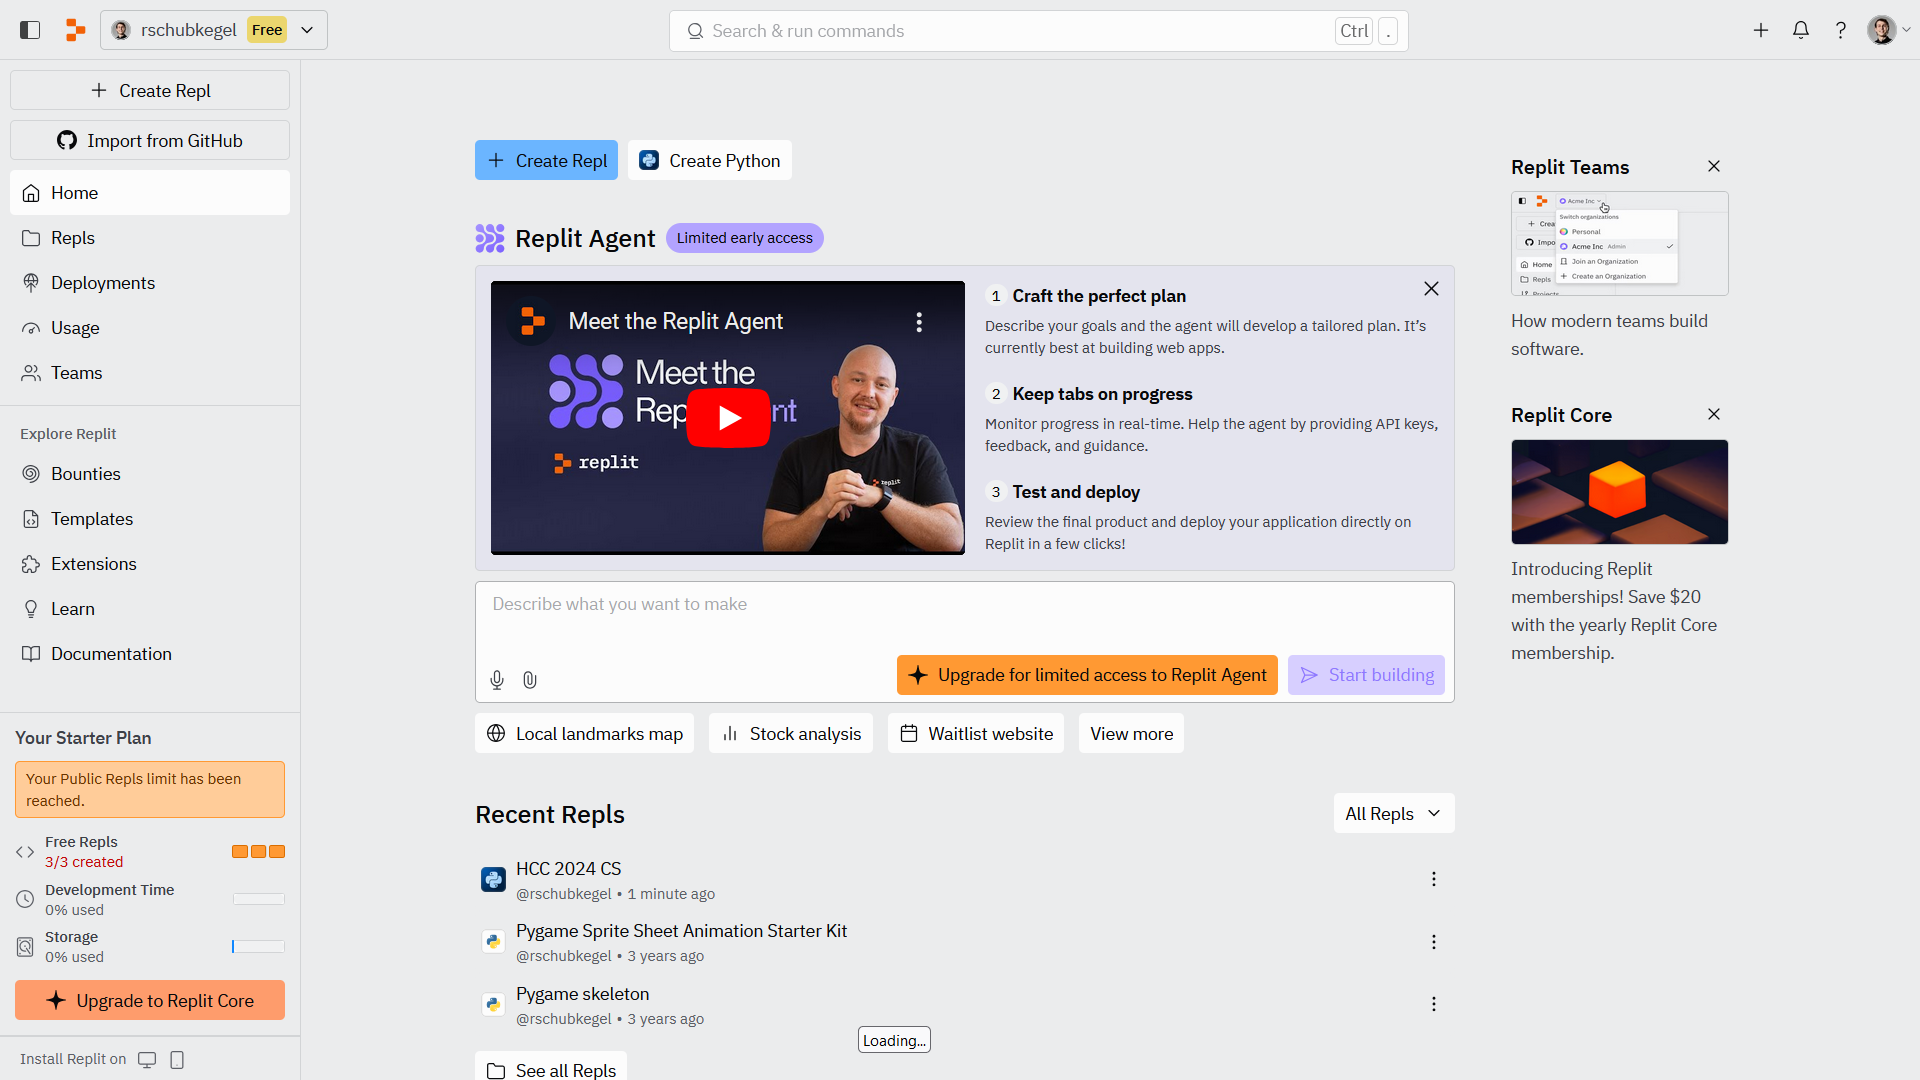
From the dashboard, you will see a blue button at the top of the screen that says ”+ Create Repl”—press that to show the new project dialog.
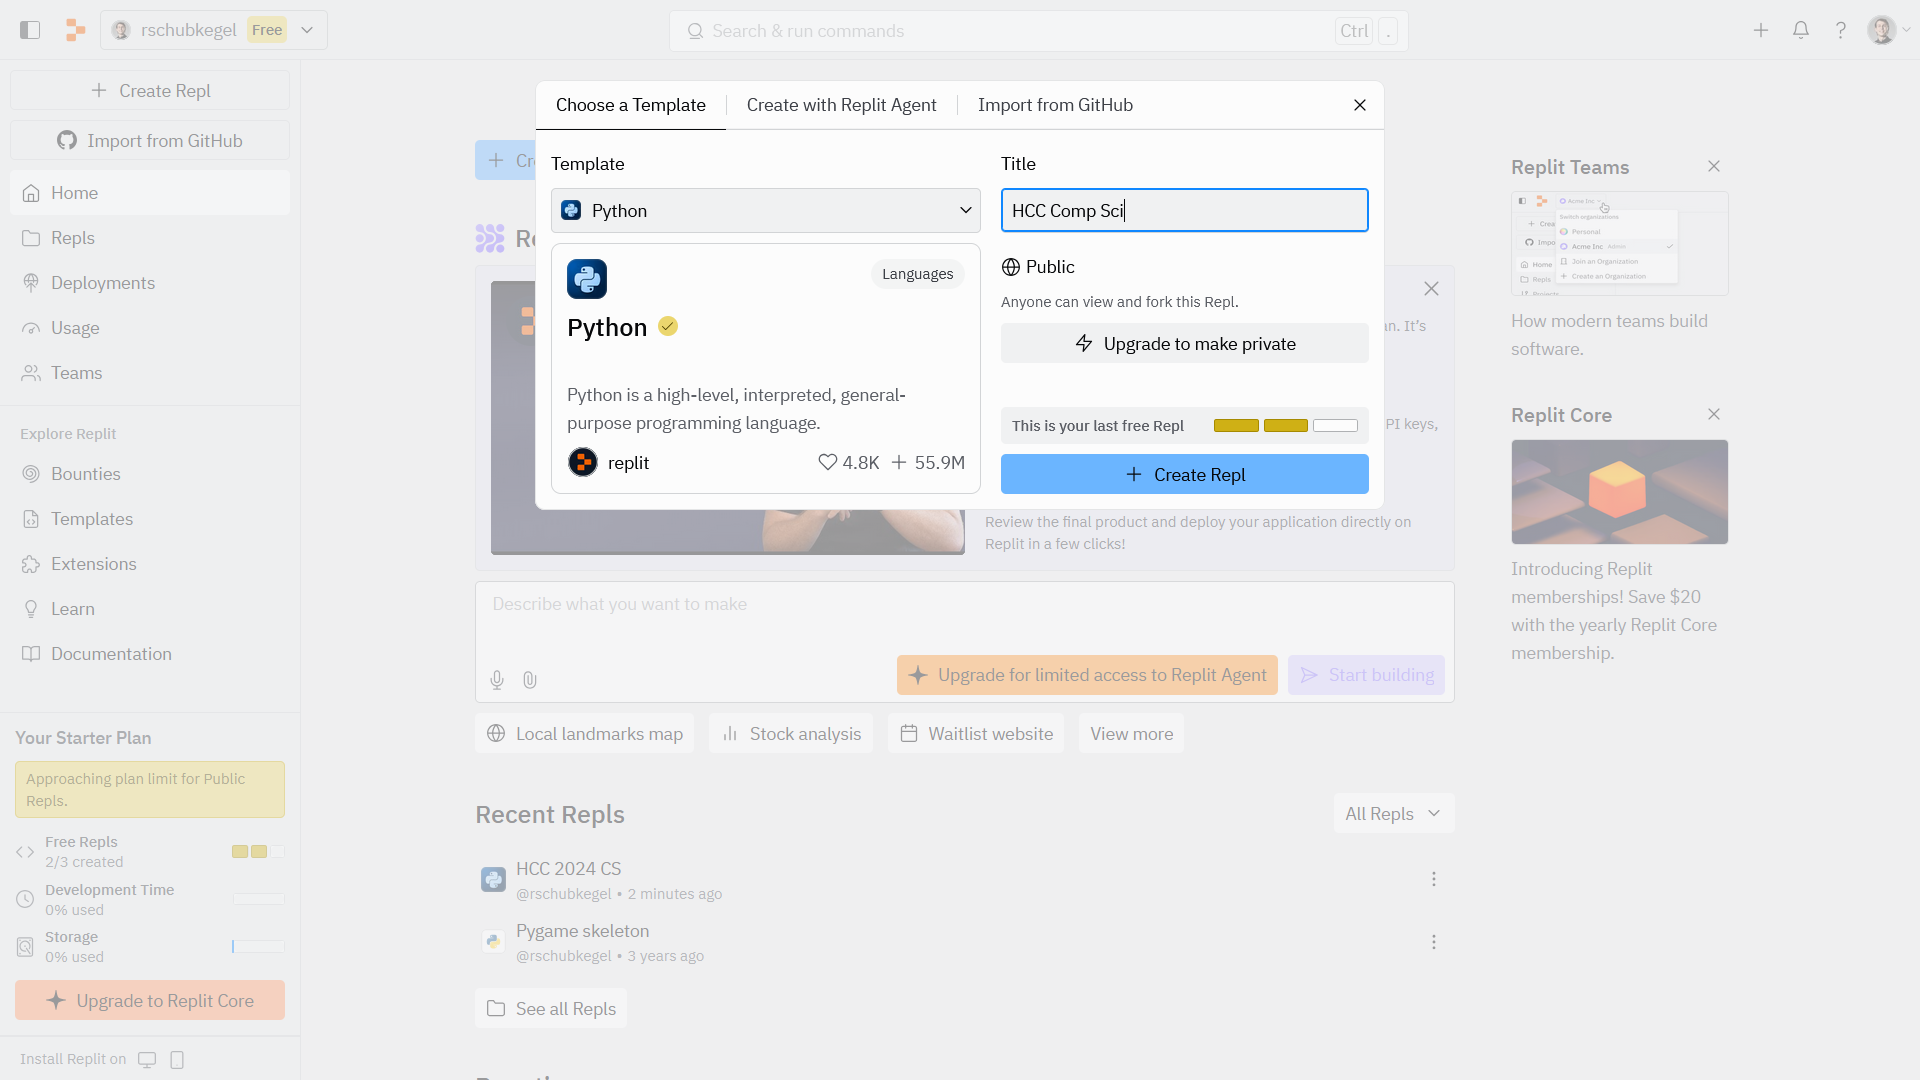
Select Python as the project language. Give the project a descriptive title, such as “HCC Comp Sci.” Press “Create Repl” to enter the editor.
3. Add Project File
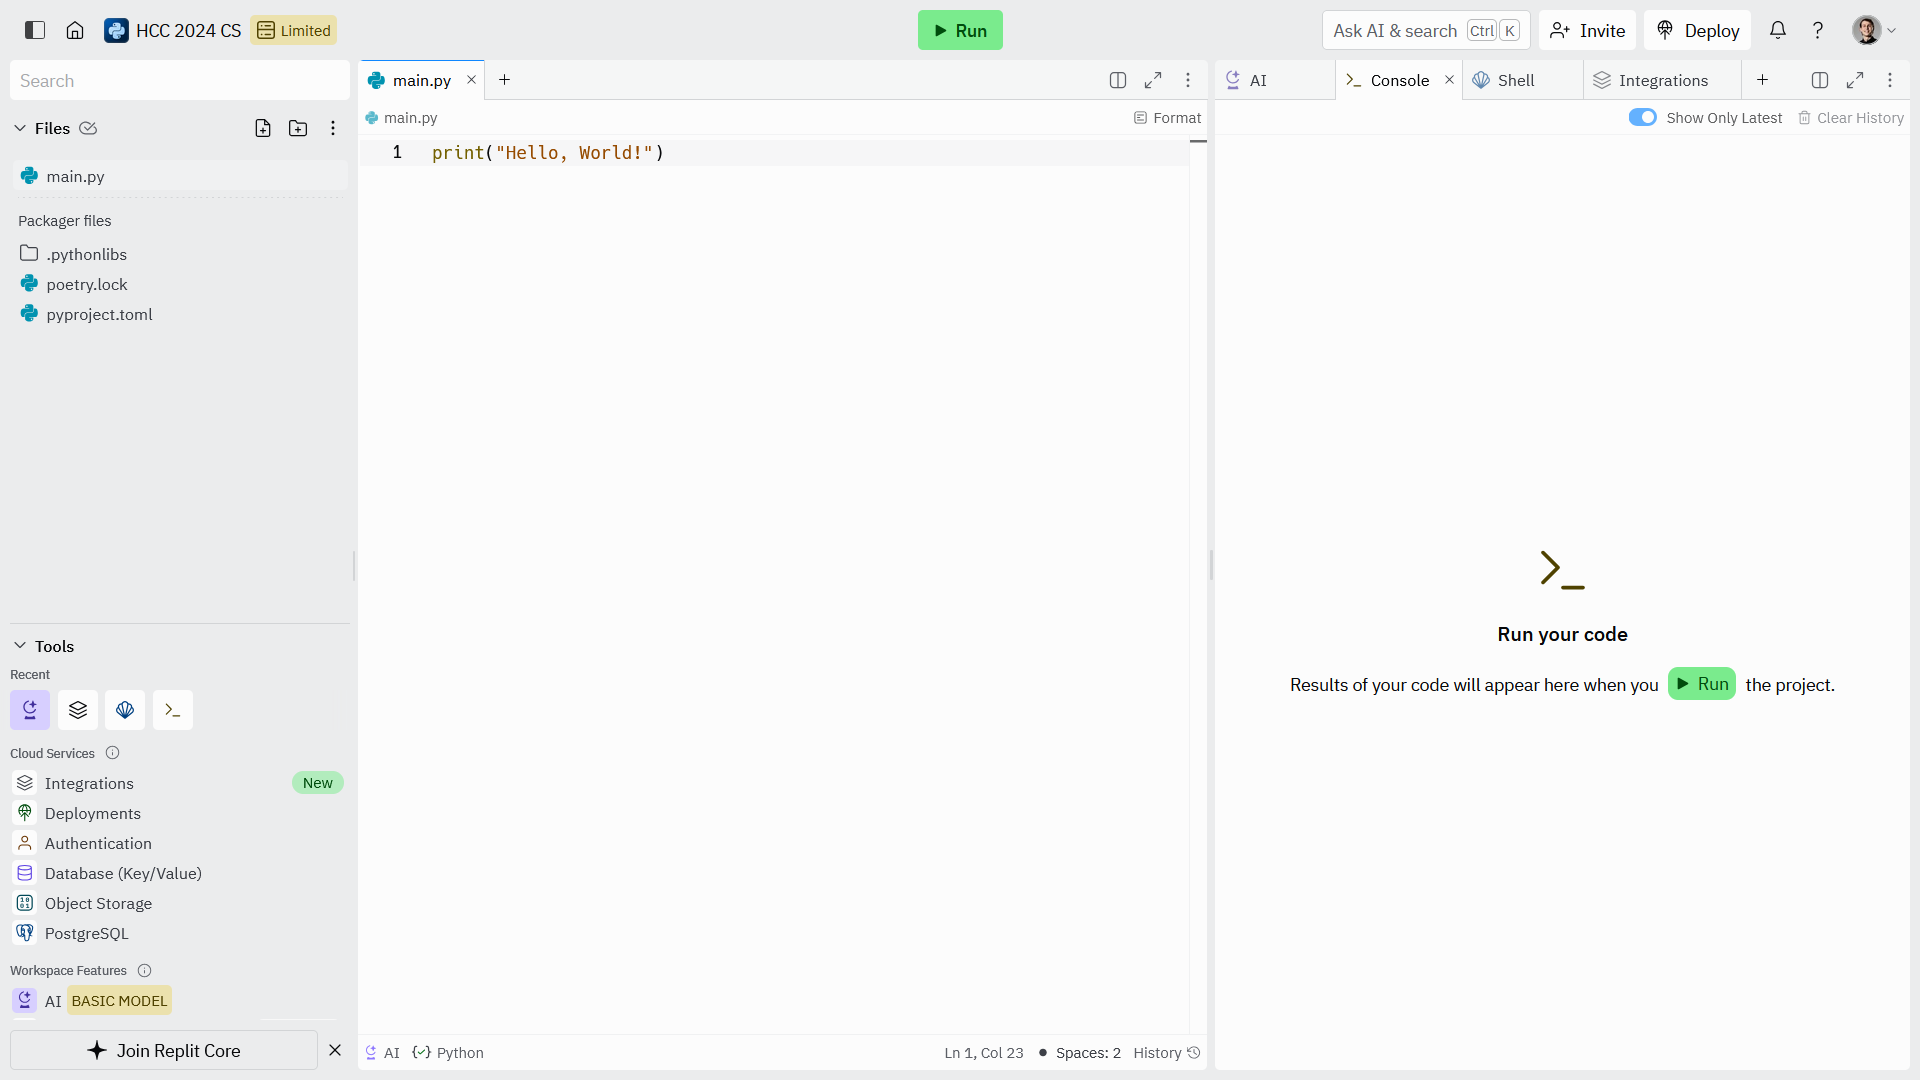
Your editor will look similar to this to start. If you press “Run” you should see the “Console” tab (a console is type of terminal) appear with “Hello, World!” printed to the screen.
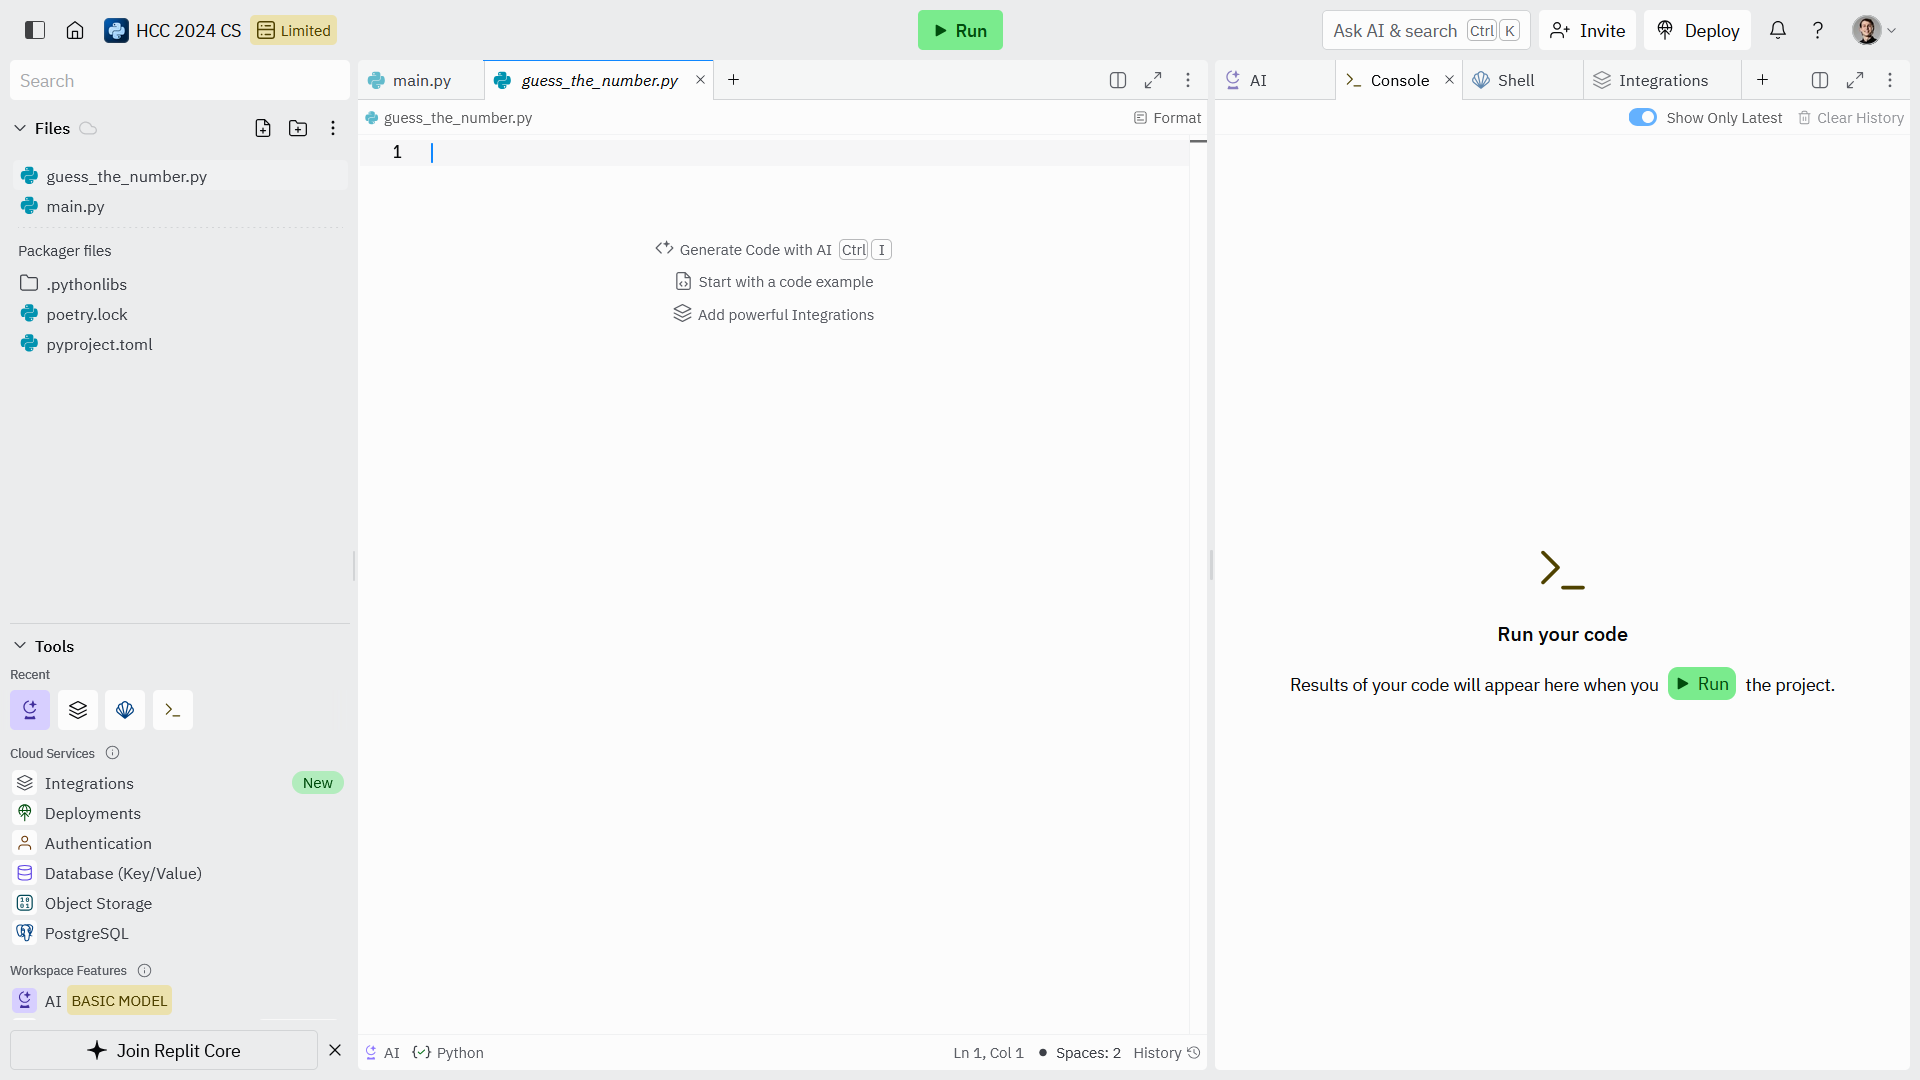
For each project going forward, you will create a new file by pressing the “New file” button at the top left of the screen. Use lowercase and underscores to write a file name that matches the project. Make sure to end the file name with the .py extension so Replit knows it is a Python script.
In my example, I created the guess_the_number.py file for the “Guess the Number” project.
This file is where you will write all your code. For the “Guess the Number” project, you can copy and paste the example code from the assignment page.
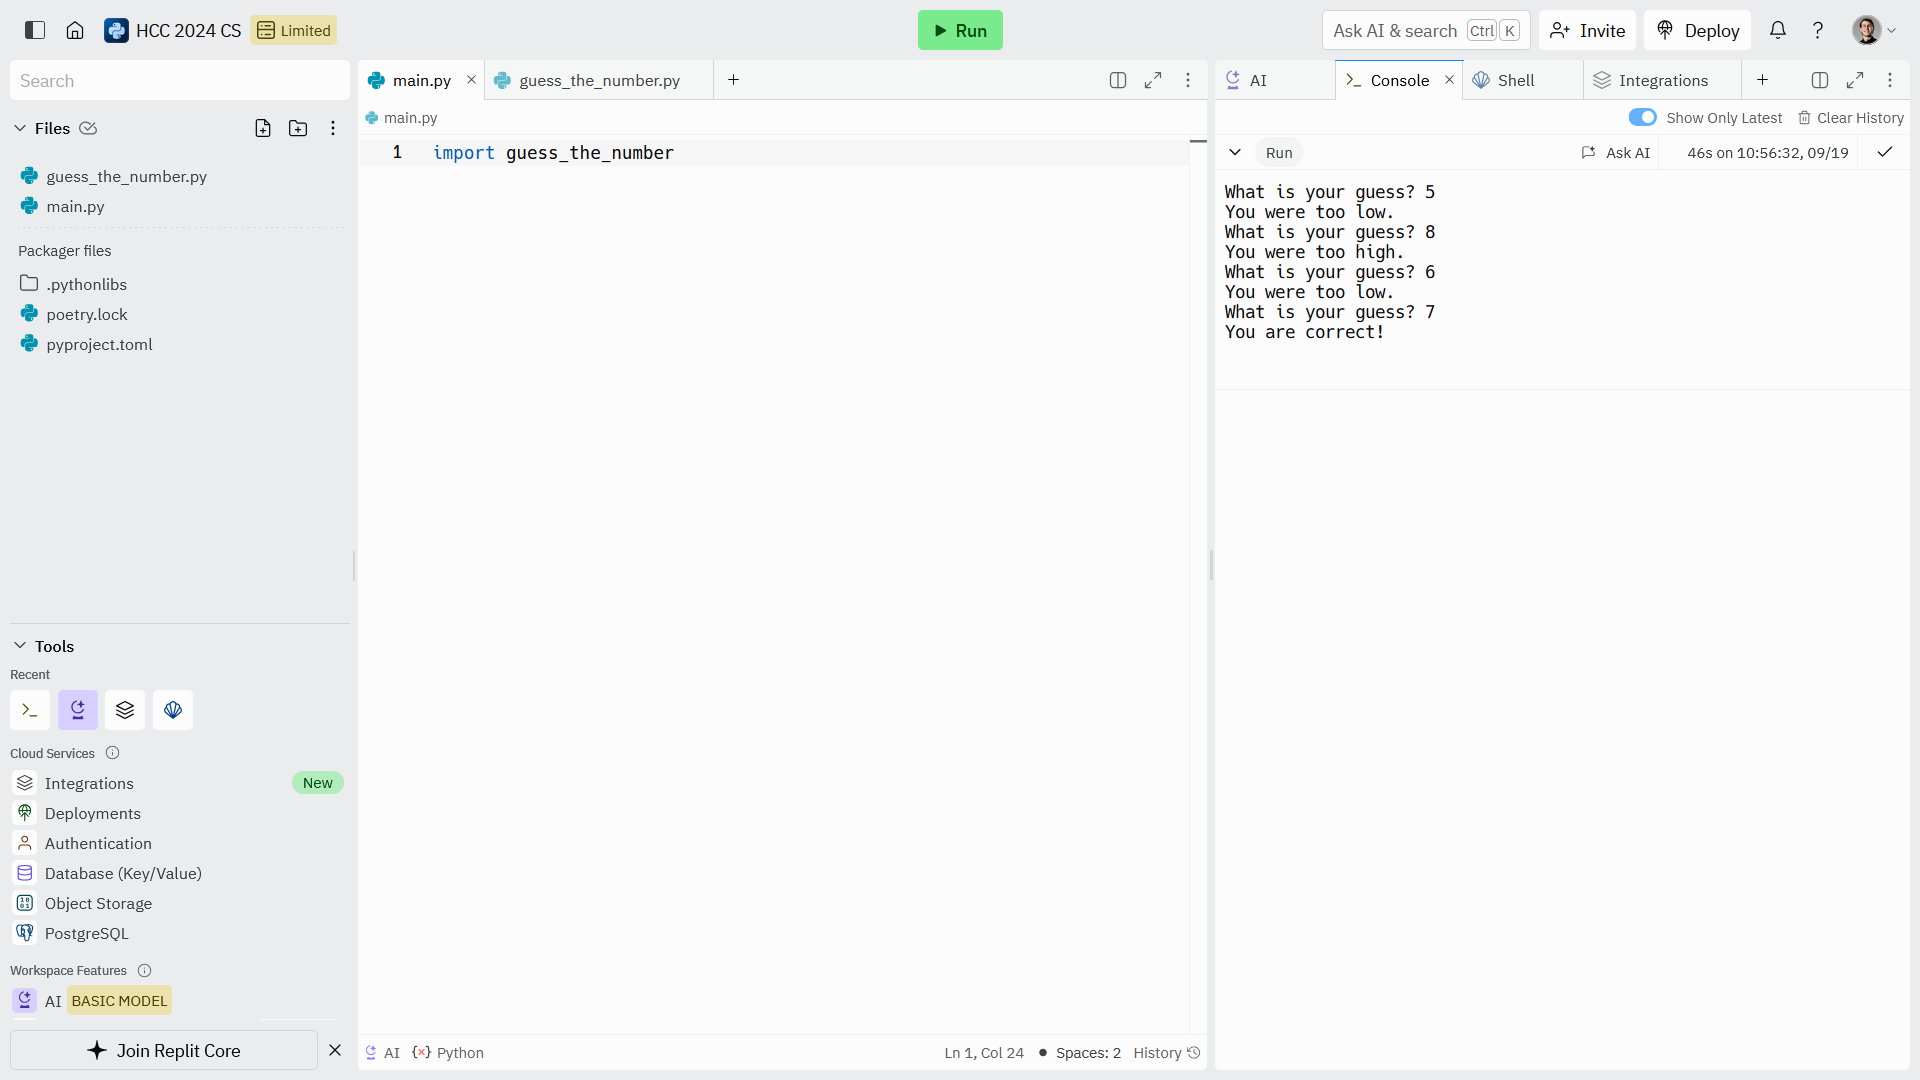
If you try to run your code, you will still see “Hello, World!” printed to the console. That is because the Replit environment looks for a file called main.py and automatically runs that one. To run the guess_the_number.py script, you must import it in the main file.
In main.py, replace the “Hello, World!” code with the following line:
import guess_the_number
Make sure it matches the file name exactly. When you press “Run” you will see the code from the guess_the_number.py file execute!
In future projects, you will comment out the import in main.py and import a new project file.
If you have any trouble with the steps above, reach out as soon as possible!
Password Generator
26 Sep 2024
2 Oct 2024
12
click to copy
A good safety practice is to randomly generate your passwords; this makes it very difficult for a hacker to guess your password. In this assignment, you will implement your own password generator.
Your program must meet the following specifications:
Create a list variable with possible characters to pick from
Ask the user for the password length
Use a loop to randomly select characters (a-f & 0-9)
Print the generated password to the terminal
A common technique in brute-force hacking is to create special “dictionary” of words and phrases that are specific to the person they are hacking. Lots of people choose a password they can remember that includes their birthday, their pet’s name, the school they attend, etc. However, that is very insecure because that information is fairly easy to obtain through social media, conversations with friends, or public records.
Previously you made a quiz game. In this project, you will refactor the project and expand it with new features.
Refactoring is the process of rewriting code without changing its behavior. This often happens to improve readability, maintainability, or performance.
Your revised quiz must still meet these original specifications:
Includes 1010 😉 or more questions
Tells the user if they were right or wrong after each question
Gives the user a score at the end
Additionally, you must refactor the code to use the following techniques:
Store your quiz questions in a list
Use a loop to ask all of the questions
Remember, new assigments should not have their own Replit projects. There should be a new file for this project that is imported in main.py (and make sure to comment out previous projects). Review the Set Up Replit project page for steps.
Previously your projects have been simple enough to complete in one week, but now it’s time to turn up the heat 🔥
During the next two weeks, you will program a game of Tic, Tac, Toe to test your knowledge of functions. This week, you must submit a program that matches the following specifications:
Which will result in somthing like the following output:
-------------| X | | |-------------| | O | X |-------------| O | | |-------------
Printing Without a Newline
So far, each time we have called print() it has automatically added a newline character to the end of whatever string we pass as an argument. However, according to the Python 3 docs we can provide a named argument for the parameter end to change what gets printed at the end of our string. Here is an example:
print('Hello, ', end='')print('World!')print('This is a new line.')
Which prints the following output:
Hello, World!This is a new line.
Named arguments are a more advanced feature in Python. If you are curious, this article dives into different types of arguments and parameters.
In part 1 of this project, you created the functions necessary to print a game board; in this part you will add the game state and player input 🕹️
Your program must follow these specifications:
Import your work from part 1 into a new file
Create a board variable that represents an empty 3x3 game board
Within a loop, do the following:
Print the board to the terminal
Ask “Player X” and “Player O” to take turns placing pieces
Update board variable with 'X' or 'O' value depending on the player’s move
Organize the Project
Previous projects have been simple enough to keep everything in a single file. Since this project is bigger, we are going to split it into multiple files!
Rename your file from part 1 to tic_tac_toe_board.py
Create a new file called tic_tac_toe.py
Import just the print_board function, like so:
from tic_tac_toe_board import print_board
Now, you can use the imported function to print the board variable each time through your loop!
Game State
The current “state” of the game is stored in the board variable. Each board is a “table” that includes 3 rows, each with 3 columns. A single “cell” of the table represents what piece has been placed on the board. At the beginning of the game, no move have been made, so the board is empty. You can initialize the empty board like this:
As the game progresses, each player will add pieces to the board (represented by 'X' or 'O') so that a complete game board might have a value like this:
In part 1 of this project, you created the functions necessary to print a game board. In part 2 you added the game state and player input. Now, it’s time to add the final touch: winning! 👑
Your program must follow these specifications:
Add new code to the tic_tac_toe.py file
Create a new function called check_winner (see details below)
Will return one of these values: 'X', 'O', 'tie', or None
In the main game loop, call the function check_winner and do the following with the results:
If 'X' or 'O', stop looping and announce the winner
If 'tie', stop looping and announce that the game was a “cat game”
If None, continue the loop as normal
When a player gets three pieces in a row (horizontally, vertically, or diagonally) the game loop must end and the winner must be announced
If all cells on the board are filled with pieces (but no player has won) the game loop must end and it must be announced that it was a “cat game” (draw, tie)
Checking the Winner
Your new function check_winner must check the current game state (in board variable) and do the following:
If a player gets three pieces in a row (horizontally, vertically, or diagonally) return that player’s piece ('X' or 'O')
If all cells on the board are filled with pieces (but no player has won) return 'tie'
Otherwise, return None
Thare are several ways that you can check whether a player has three pieces in a row, it doesn’t really matter how you do it. The important thing is that a player can win, lose, or tie to end the game.
Just make sure to test your code before submitting!
Submit Assignment
When your program meets the requirements, download and submit tic_tac_toe.py (which is part 2 & 3 of the project).
Replit is a cloud service, meaning your code runs on someone else’s machine. However, if you run out of “Development Time” (bottom left corner of dashboard) and you don’t want to pay for the service, it’s time to set up your computer to run Python locally.
You are not required to run Python locally. If you want to pay for a Replit subscription, you can skip this assignment. It does not matter for projects.
Install Python
A Python interpreter reads a line of Python, converts it to bytecode, then executes it in the Python Virtual Machine (which is machine code that your computer can understand). In order to run any Python program, you need an interpreter.
Go to the downloads page on python.org and download the latest Python version (big yellow button). When the installer finishes downloading, run it.
Make sure “run as admin” is unchecked and “add to PATH” is checked.
Run the default installation (not custom install).
When the installation finishes, you can verify that Python is installed by opening Windows Command Prompt and running the following:
python --version
If you have any issues with this step of the process, send me an email and I can help walk through the process.
Install VS Code
You don’t need anything special to write Python code. However, an integrated development environment (IDE) makes it much easier.
OneCompiler, JDoodle, and Replit are IDEs that include syntax highlighting, code completion, and a simple UI to run your code. However, they are limited because they run in your browser (as a cloud application). Visual Studio Code (VS Code) is an IDE that you can run on your own computer.
When the installation finishes, run the application. Install the Python extension to enable syntax highlighting, code formatting, and other features.
When the installation finishes, you are now ready to code!
Organizing Projects
To keep everything organized, I recommend keeping your Python files in a single folder. For example, C:\Users\Rylan\Documents\Scripts. After you create a folder for your projects, open it in VS Code by navigating to File > Open Folder.
You can now create a python file in the “Explorer” tab (two pages icon, left side), write some code in it (e.g. print("Hello, World!")), save it, and run it using the “Run Python File” button (play icon, top right).
Previously you had to import each project in main.py; that is no longer required when running VS Code locally!
Resolving Issues
The quickest and easiest way to resolve issues is to contact me. I am happy to set up a time to walk through the installation process or help you transfer projects from Replit.
Dice Rolling Simulator
31 Oct 2024
6 Nov 2024
12
click to copy
A common way to add excitement to games is to add randomness. For board games, this is usually in the form of dice; in this project, you will create a program that emulates rolling dice.
Your program must satisfy the following specifications:
Allow user to select the number of faces of the die they will roll (D6, D12, or D20)
In a loop, allow the user to do one of two things:
To practice loading and saving files, you will extend the Guess the Number project to incorporate persistent high scores. I highly recommend that you make a copy of the project and edit the copy instead of editing the original project directly.
Your program must meet the following requirements:
Here is a simple example of a 2-page story dictionary (remember, yours must be at least 10 pages):
story = { 1: { "text": "Hello, world! It's a great day for looping, don't you agree?", "options": [ { "text": "I agree 👍🏻", "page": 1 }, { "text": "I disagree 👎🏻", "page": 2 } ] }, 2: { "text": "Well, we can agree to disagree.", "options": [ { "text": "THE END", "page": None } ] }}
Example Output
Hello, world! It's a great day for looping, don't you agree? 1) I agree! 2) I disagree!>> 1Hello, world! It's a great day for looping, don't you agree? 1) I agree! 2) I disagree!>> 3Invalid choice "3"Hello, world! It's a great day for looping, don't you agree? 1) I agree! 2) I disagree!>> 2Well, we can agree to disagree. 1) THE END>> 1
Submit Assignment
When your program meets the requirements, download and submit your .py file here:
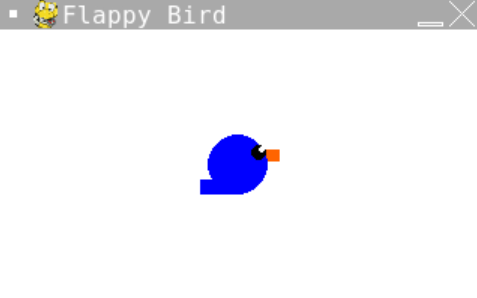
Flappy Bird is a classic game where the player controls a bird and tries to avoid obstacles. In this assignment, you will create a simple version of Flappy Bird using Python and Pygame.
The project will be split into three weeks but you must submit the program each week. This week, you will get familiar with drawing graphics using basic shapes.
Make sure to use more than one type of shape (i.e. don’t only use rectangles)
Call the function in your main game loop
Pygame
Pygame is a Python library for creating games. It provides a set of functions and classes that make it easy to create graphics and sound for your game.
Install for Replit
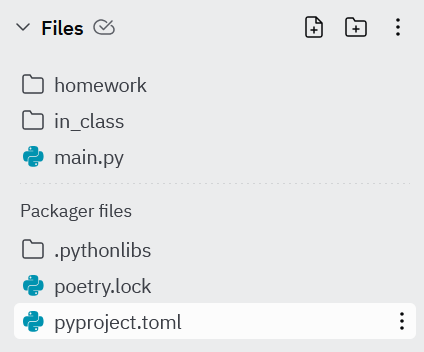
Open project.toml and update the [tool.poetry.dependencies] section to match the following:
Next time you run a project, Replit will automatically install the required packages.
Install for VSCode
Open Command Prompt (View > Terminal or Ctrl + `) and run the following:
pip install pygame
Now you can import the pygame module in your Python code!
Project Structure
This project will be larger than previous projects which makes it important to organize the code. Here is the basic structure your program should follow:
Import modules
Define constants
Define functions
Define game variables (will do this next week)
Initialize Pygame
Main game loop
Here is a basic template for you to start with:
# Import modulesimport pygame# Define constants (using CAPS_CASE convention)WINDOW_WIDTH = 320WINDOW_HEIGHT = 180# Initialize Pygamepygame.init()game_window = pygame.display.set_mode((WINDOW_WIDTH, WINDOW_HEIGHT))pygame.display.set_caption("Flappy Bird")# TODO: Define functions here# Game looprunning = Truewhile running: # Handle events (allows the user to quit the game) for event in pygame.event.get(): if event.type == pygame.QUIT: running = False # Draw background color game_window.fill(WHITE) # TODO: Call functions here # Render graphics to window pygame.display.flip()
Drawing Shapes
Pygame provides a set of functions that you can use to draw shapes on the screen. Here are some examples:
Use these functions to draw a bird your new function!
NOTE: Feel free to customize the bird to your liking, it doesn’t have to look like mine!
Colors
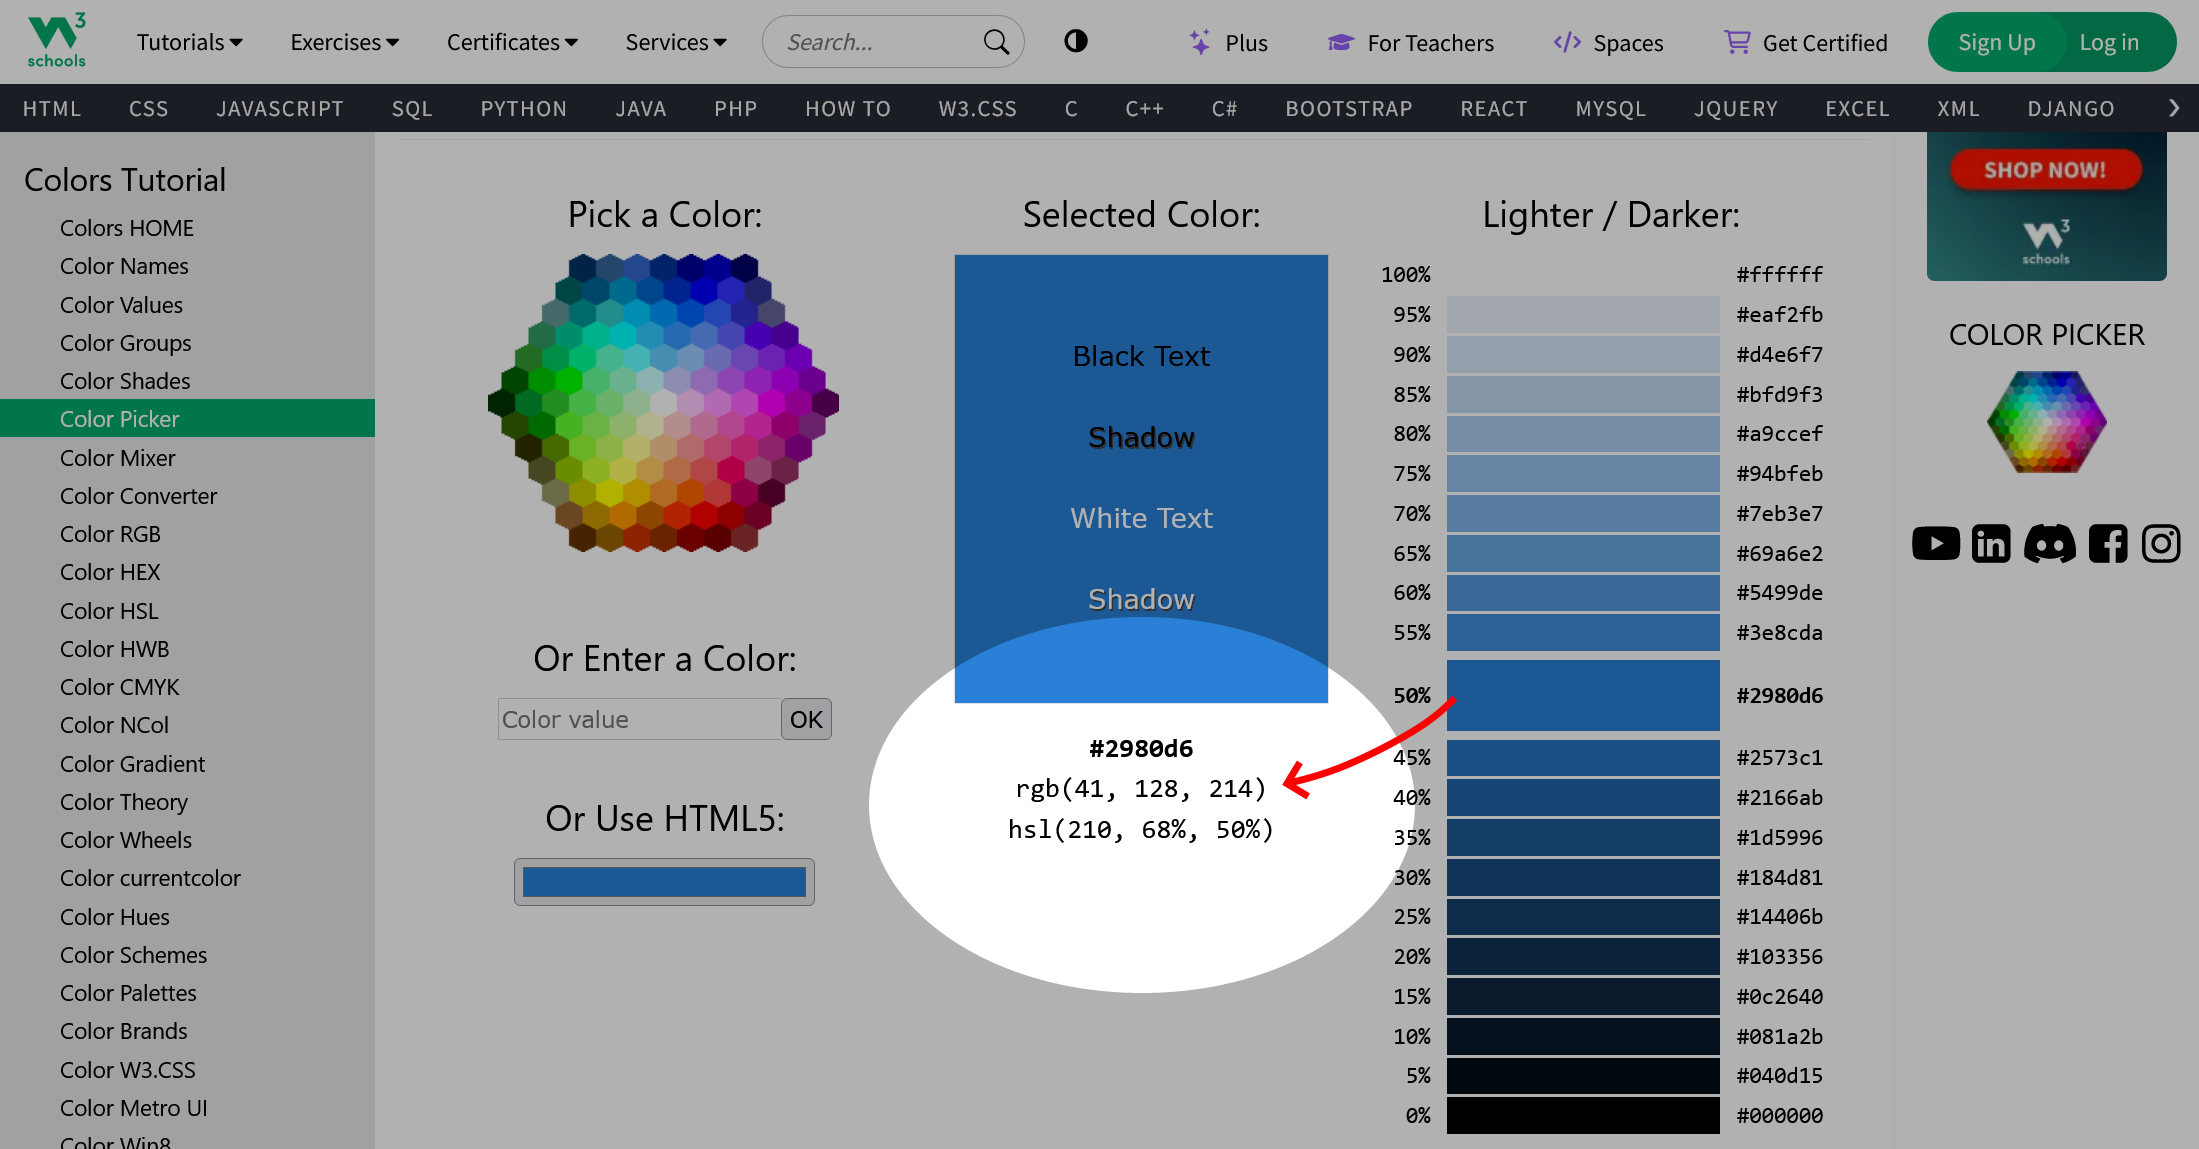
In Pygame, colors are represented by tuples of three integers (RGB) where each integer ranges from 0 to 255. For example, (0, 0, 0) is black, (255, 255, 255) is white, and (255, 0, 0) is red.
To define a color that you like, you can use a color picker (this one from W3Schools is good) and copy the RGB values.
Submit Assignment
When your program meets the requirements, submit your .py file here:
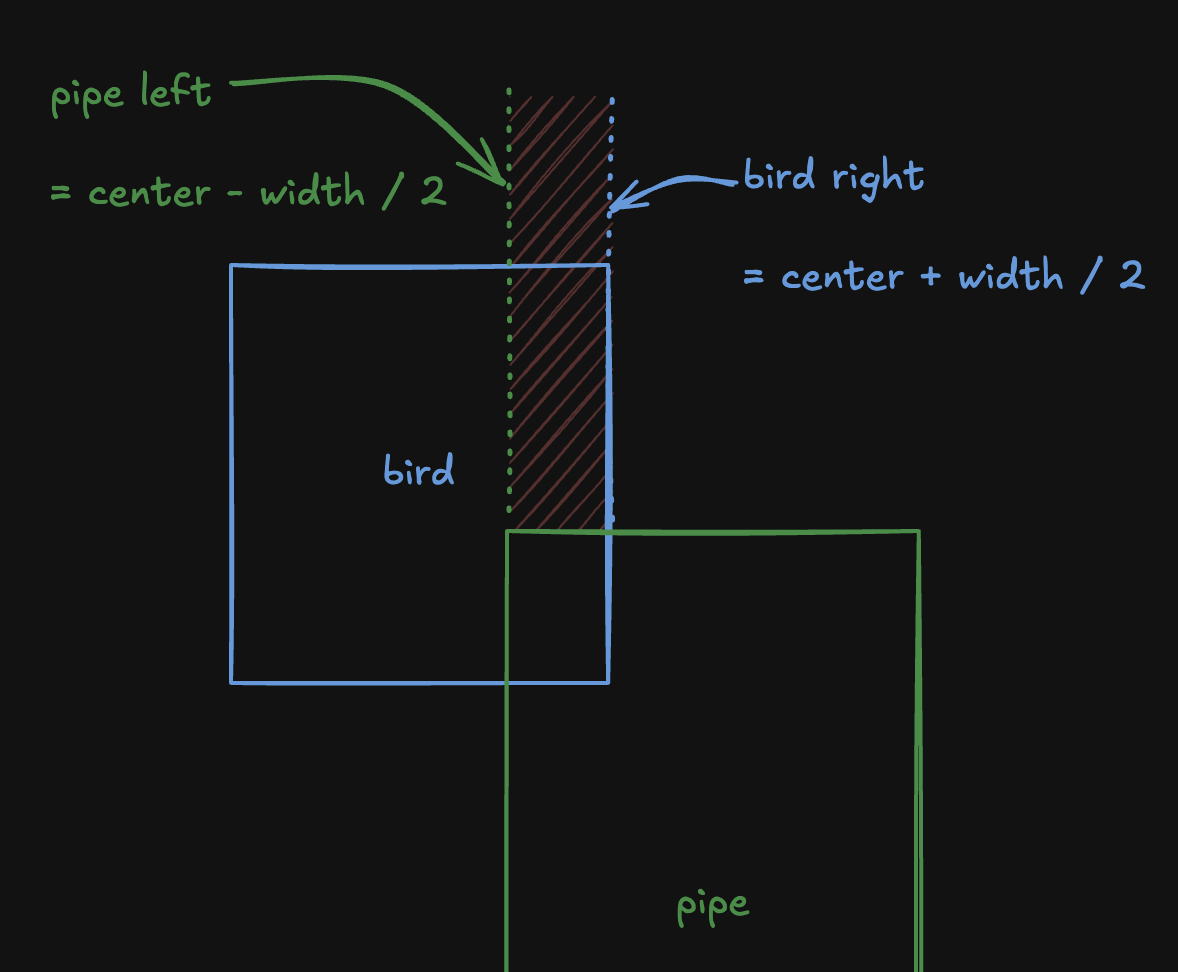
Left edge of the pipe and the right edge of the bird
Right edge of the pipe and the left edge of the bird
Bottom of the top pipe and top of the bird
Top of the bottom pipe and bottom of the bird
As an example, here’s a sketch of the first condition you’ll be checking:
And here is the code to check it (you may have to adjust the calculations):
# Calculate right/left sides of pipe (rectangle) hitboxpipe_right = pipe_x + PIPE_WIDTHpipe_left = pipe_x# Calculate right/left sides of bird (circle) hitboxbird_right = bird_x + BIRD_SIZE / 2bird_left = bird_x - BIRD_SIZE / 2# Check if there is a collision in the X dimensionx_intersects = pipe_left < bird_right and pipe_right > bird_left
Tracking Score
You can keep track of the score in a couple of different ways:
Increase score every frame
Increase score every time the player passes a pipe
Either way, you need to make the score increase as the game continues.
Rendering Text
Rendering text in Pygame is a three-step process:
Create a font
Use font to render text to a surface
“Blit” the surface to the screen
Here’s what those steps look like:
# Create a font object (using the default font)size = 32font = pygame.font.Font(None, size)# Render text to a surfacetext = f"Score: {score}"antialiased = Truecolor = (0, 0, 0)rendered_text = font.render(text, antialiased, color)# Blit the surface to the screencoordinates = (16, 16)game_window.blit(rendered_text, coordinates)
Remember: you will need to re-draw the text every frame.